Introduction in data visualization tools
Introduction
In the Vetskilling project, we deliberately use various data visualization platforms to teach students that multiple options are available for visualizing data. By working with different tools, we enhance their understanding of the possibilities and limitations of each platform. This approach helps students develop a broad set of skills and makes them more adaptable in their future professional practices. Specifically, we use these platforms to visualize data from weather stations. This allows students to gain experience in analyzing and presenting real-time measurement data in a clear and insightful manner. The platforms used are briefly explained in this emodule with easy access to information about the features and applications of each tool.
Thingsspeak
Thingspeak is an open-source IoT platform that allows users to collect, store, analyze, and visualize data from connected devices or sensors. The platform is especially popular for projects involving sensors and microcontrollers such as Arduino and Raspberry Pi, offering the ability to manage real-time data in the cloud.
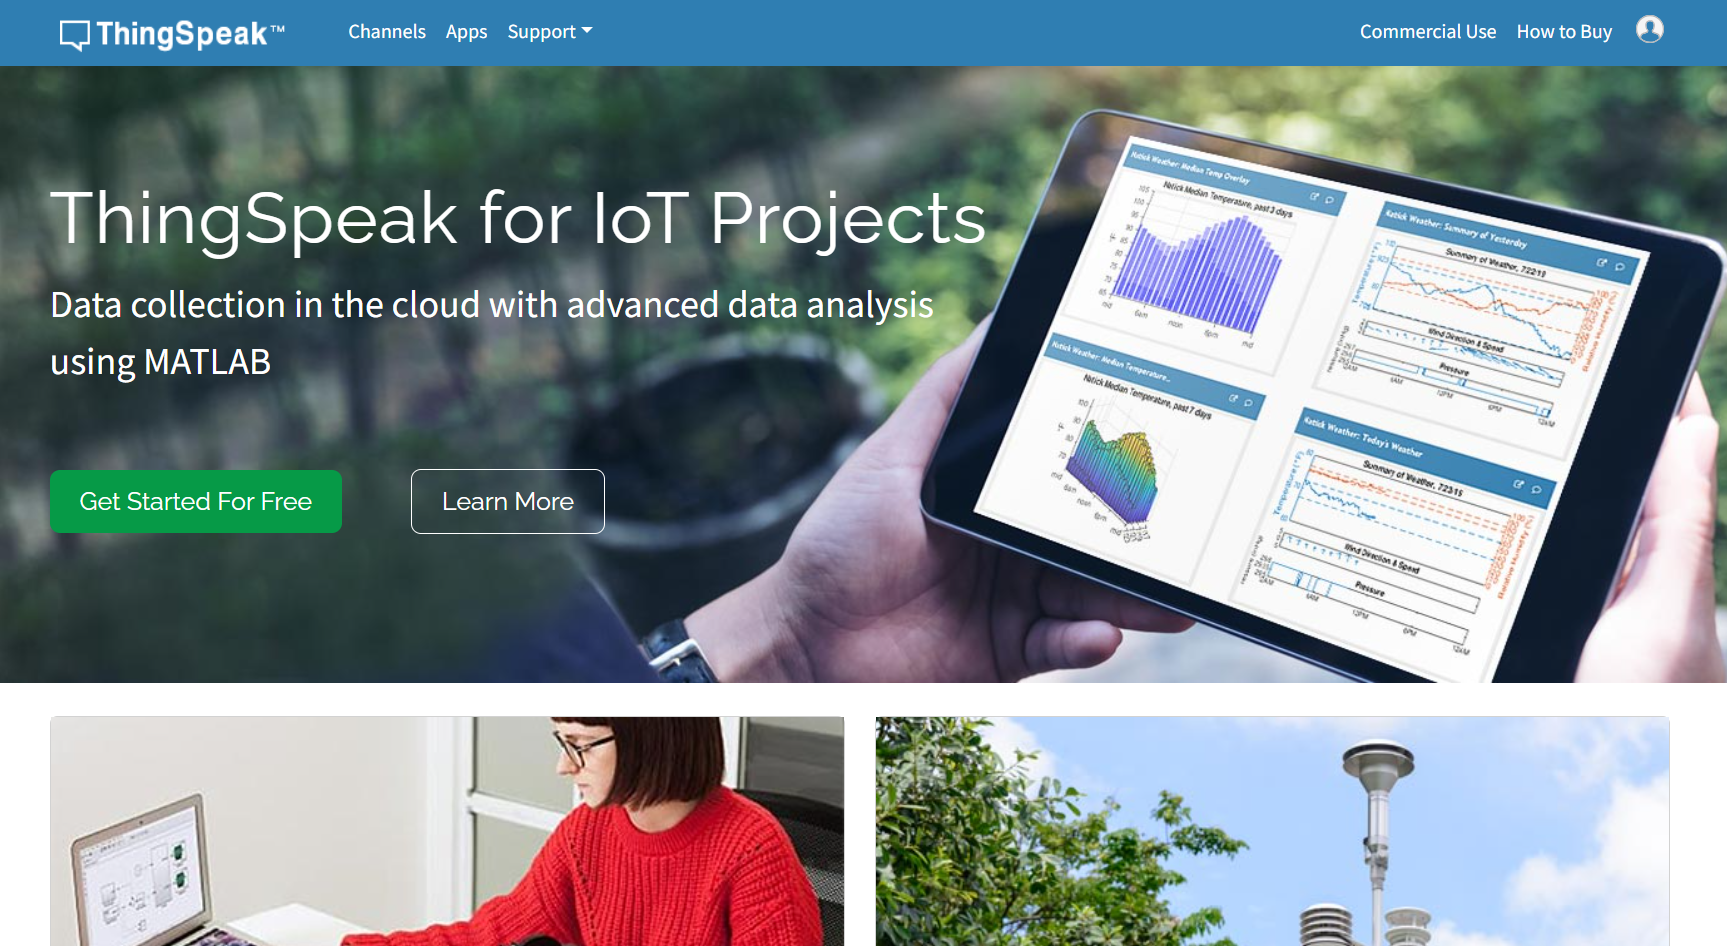
With Thingspeak, users can easily upload sensor data to specific channels where it is stored and can be analyzed. The platform includes built-in data visualization features, such as charts and graphs, that present data in a clear format. Additionally, users can utilize MATLAB scripts to perform advanced analyses and gain insights.
A key feature of Thingspeak is its ability to share data and connect with other services, such as IFTTT (If This Then That), to trigger automated actions based on sensor readings. The platform also supports the use of APIs, enabling easy integration of data with other applications or tools.
In summary, Thingspeak is a useful platform for students and professionals to carry out IoT projects and to visualize, analyze, and utilize sensor data for various applications.
Step-by-step guide
Here is a step-by-step guide on how to use the Thingspeak platform:
Step-by-Step Guide for Using Thingspeak:
-
Create an Account:
-
Create a New Channel:
- Click on 'Channels' and then on 'New Channel'.
- Fill in the channel name and descriptions, and add the fields (e.g., temperature, humidity) you need.
- Click on 'Save Channel' to complete the channel creation.
-
Collect Data:
- Use a microcontroller (e.g., Arduino or Raspberry Pi) to read and send sensor values to Thingspeak. This can be done via an HTTP POST request with an API key.
- Install the necessary libraries and write a script to send the data. For Arduino, you can use the
ThingSpeak.h
library.
-
Send Data to the Channel:
- Add the channel ID and API key (found in your channel settings) to the script.
- Ensure the script sends data based on your desired time interval.
-
Visualize the Data:
- Go to your Thingspeak channel to view live graphs of the transmitted data.
- Customize the visualizations by adjusting the graph settings and selecting custom time periods.
-
Perform Data Analysis:
- Use the built-in MATLAB Analysis tool in Thingspeak to perform data analysis.
- Write MATLAB code to make calculations or perform advanced analyses, such as trend identification or data filtering.
-
Set Up Alerts and Triggers:
- Set up alerts using the React app in Thingspeak to send notifications or perform actions when specific thresholds are exceeded.
- Connect Thingspeak with other IoT services such as IFTTT for automated responses.
-
Share and Integrate:
- Make your channel public if you want to share the data, or keep it private for personal projects.
- Use the API keys to integrate the data with other applications or platforms.
With these steps, you can easily start collecting, storing, and visualizing sensor data via Thingspeak and make the most of the platform for your IoT projects.
Grafana
Grafana is an open-source data visualization and monitoring tool used to collect, analyze, and present data from various sources in real-time. It is especially popular in the IT and DevOps world for its capability to create comprehensive dashboards for monitoring infrastructure, applications, and IoT solutions.
Features of Grafana:
-
Multiple Data Sources: Grafana supports various data sources, such as InfluxDB, Prometheus, Elasticsearch, MySQL, PostgreSQL, and more. Users can combine data from multiple sources into a single dashboard, allowing analysis from different perspectives.
-
Customizable Dashboards: Users can create fully customizable dashboards with different types of charts, such as line graphs, bar charts, tables, and heatmaps. These visual representations help identify trends and patterns.
-
Alerting: Grafana offers a robust alerting feature that allows users to set notifications based on specific thresholds or conditions. When certain criteria are met, alerts can be sent via email, Slack, PagerDuty, and other platforms.
-
Plugins and Extensions: The platform has a wide selection of plugins that enable users to add extra functionalities. These plugins allow the use of custom panels, new visualizations, and integrations with other tools.
-
Access Control and Permissions: Grafana provides extensive options for managing access and permissions for users and teams. This makes the platform suitable for use within large organizations with varying roles and responsibilities.
-
Open-Source and Paid Versions: Grafana is fundamentally an open-source platform but also offers paid versions with additional features, such as advanced analytics, team collaboration, and cloud hosting services.
Use of Grafana:
Grafana is used to visualize data from different sources in the form of clear dashboards. This is useful for monitoring system performance, tracking real-time sensor data, analyzing business metrics, and more. Users can combine historical data and real-time data to recognize patterns and make better-informed decisions.
Due to its flexibility and extensive capabilities, Grafana is an essential tool for anyone looking to make large amounts of data more accessible and to set up real-time monitoring and alerts.
Step-by-step guide
Here is a step-by-step guide on how to use the Grafana platform:
Step-by-Step Guide for Using Grafana:
-
Install Grafana:
- Download Grafana from the official website and install it on your local machine or server.
- For cloud use, you can sign up for Grafana Cloud and start immediately without installation.
-
Start and Log In:
- Start the Grafana server and go to
http://localhost:3000
(or the IP address of your server).
- Log in with the default credentials (username: admin, password: admin) and change the password after the first login.
-
Configure a Data Source:
- Click on 'Configuration' and then 'Data Sources'.
- Add a new data source by selecting one of the supported databases (e.g., InfluxDB, Prometheus, Elasticsearch).
- Enter the required configuration details, such as the URL and authentication information, and save the data source.
-
Create a Dashboard:
- Go to 'Create' and click on 'Dashboard'.
- Add a new panel and select the desired data source.
- Choose the type of visualization (e.g., line chart, bar chart, table) and set the query to retrieve the data.
-
Configure Your Charts:
- Customize your chart settings, such as axes, titles, colors, and time ranges.
- Add more panels to visualize different data points and create an organized dashboard.
-
Set Up Alerts:
- Click on the panel you created and go to the 'Alert' tab to set up an alert.
- Configure the conditions and thresholds, and add a notification channel to send alerts via email, Slack, or other services.
-
Customize and Share Your Dashboard:
- Personalize your dashboard with custom titles and descriptions for better clarity.
- Share your dashboard by making it public, sharing a link, or exporting it as JSON.
-
Manage Users and Permissions:
- Go to 'Server Admin' and add users and teams.
- Set access permissions to determine who can view and edit dashboards.
-
Use Plugins and Extensions:
- Install plugins for additional functionality by going to 'Configuration' > 'Plugins'.
- Add new visualization plugins and integrations for more advanced capabilities.
With this guide, you can easily start using Grafana to visualize data from various sources, set up real-time monitoring, and gain valuable insights.
Home Assistant:
Home Assistant is an open-source platform used for automating and managing smart devices in a home. It serves as a central hub to connect and control various devices and services, allowing users to create an integrated and personalized smart home system.

Features of Home Assistant:
-
Open-source and community-driven: Home Assistant is fully open-source and has an active community that contributes to updates, plugins, and integrations. This keeps the platform flexible and up-to-date with the latest technologies.
-
Wide support for devices: The platform supports thousands of devices and services from different brands, including smart lights, thermostats, security cameras, door locks, and voice assistants like Google Assistant and Amazon Alexa. This makes it one of the most versatile home automation platforms.
-
Local control and privacy: One of the main advantages of Home Assistant is that it runs locally on your own hardware, such as a Raspberry Pi or NAS. This means that the platform safeguards your privacy and is less dependent on the cloud, enhancing the security of your data.
-
Automations: Home Assistant allows users to create complex automations that combine different devices and conditions. Users can easily set rules like "turn on the lights when the sun sets" or "send a notification and activate the security camera when the motion sensor detects movement."
-
User-friendly interface: The platform offers a customizable dashboard for monitoring and controlling all devices and automations. This dashboard can be tailored to user preferences with custom layouts and widgets.
-
Integrations and extensions: Home Assistant provides integrations with popular platforms such as Philips Hue, Sonos, IKEA TRÅDFRI, and Nest, among many others. It also supports add-ons and plugins for additional functionalities.
How to Use Home Assistant:
-
Installation: Home Assistant can be installed on various hardware such as a Raspberry Pi, a virtual machine, or even a dedicated server. There are ready-to-use installation methods available, such as Home Assistant OS, which is easy to set up.
-
Configuration: Once installed, devices can be added and configured through the web interface. Integrations can be set up to link devices, and automations can be created using YAML scripts or the built-in automation editor.
-
Automations and Scenes: Users can create automations with triggers (e.g., a specific time or event) and actions (e.g., turning on a device). Scenes can also be created to control multiple devices at once, such as turning on mood lighting and starting music with a single button press.
-
Monitor and Control: Through the dashboard, users can monitor their devices and automations, receive notifications, and manually control devices.
Benefits of Home Assistant:
- Privacy and security due to local use.
- Flexibility and customization thanks to its open-source nature.
- Broad compatibility with devices and platforms.
- Powerful automations for a personalized smart home experience.
In summary, Home Assistant is a powerful and versatile platform that is ideal for people who want control over their smart devices and customized home automation.
Step-by-step guide
Here is a step-by-step guide on how to use the Home Assistant platform:
Step-by-Step Guide for Using Home Assistant:
-
Install Home Assistant:
- Option 1: Raspberry Pi: Download the Home Assistant OS image from the official website and flash it onto a microSD card using a tool like Balena Etcher. Insert the SD card into the Raspberry Pi and power on the device.
- Option 2: Virtual Machine or Server: Install Home Assistant on a virtual machine such as VirtualBox or on a server by following the recommended Docker installation.
- Option 3: Home Assistant Cloud: Sign up for Home Assistant Cloud for an installation without dedicated hardware.
-
Access the Interface:
- Open a web browser and go to
http://homeassistant.local:8123
or use your device's IP address to access the dashboard.
- Follow the initial setup steps, such as creating a user account.
-
Add Devices and Integrations:
- Click on 'Settings' and then 'Devices & Services'.
- Search for and install integrations to connect smart devices like Philips Hue, Sonos, or Zigbee devices.
- Home Assistant often auto-detects devices on your network.
-
Set Up Automations:
- Go to 'Settings' > 'Automations' > 'New Automation' to create a new automation.
- Set a trigger (e.g., specific time or sensor activity) and define the corresponding actions (e.g., turning on lights).
- Use the built-in editor for simple automations or write complex ones using YAML scripts.
-
Create Scenes:
- Create scenes to control multiple devices simultaneously. This is useful for scenarios like a nighttime mode where lights dim and the thermostat lowers.
- Go to 'Settings' > 'Scenes' and add a new scene.
-
Customize the Dashboard:
- Modify the dashboard by adding or removing widgets and cards.
- Use the Lovelace interface for advanced customization and create different views for specific devices or rooms.
-
Set Up Notifications:
- Add notifications to receive alerts on your phone or via email for specific events, such as a door opening or a motion sensor detecting movement.
- Use add-ons like the Home Assistant Companion for mobile notifications.
-
Updates and Maintenance:
- Keep Home Assistant up to date by regularly installing updates. This can be done easily via 'Settings' > 'System' > 'Updates'.
- Create backups of your configurations to keep your data and settings secure.
Usage Tips:
- Install Add-ons: Use the Supervisor to install add-ons like File Editor, Node-RED, and MQTT Broker for additional functionality.
- Community Support: Join the Home Assistant community for assistance, tips, and updates.
- Integration with Voice Assistants: Link Home Assistant with Google Assistant or Amazon Alexa for voice-controlled device management.
With this guide, you can easily set up and use Home Assistant to make your home smarter and more efficient, with fully customized automations and complete control over your devices.
Node-RED
Node-RED is an open-source visual programming tool that allows users to create flows for connecting hardware devices, APIs, and online services. Developed by IBM, it is particularly useful for rapid prototyping and automating processes. The strength of Node-RED lies in its intuitive interface that enables users to build code and logic visually through a "drag-and-drop" approach.
Features of Node-RED:
-
Visual Programming Environment: Node-RED uses a browser-based editor where users can create flows by dragging and connecting different blocks (nodes). This allows users to build complex automations without extensive programming knowledge.
-
Wide Range of Nodes: The platform offers an extensive library of nodes for various functions, such as sending HTTP requests, processing JSON data, using timers, and sending notifications. There are also numerous community-developed nodes that enable specific tasks, such as integrating IoT devices and external APIs.
-
Easy Integration: Node-RED can be easily integrated with popular IoT platforms such as Home Assistant, MQTT brokers, and cloud services like AWS and Microsoft Azure. This makes it a versatile tool for automating smart homes, industrial applications, and other projects.
-
Flexible Deployment: Node-RED can run on various devices, such as a computer, Raspberry Pi, or even in the cloud. This makes it accessible for both hobbyists and professional developers.
-
Open-Source and Expandable: Since Node-RED is open-source, developers can create their own nodes and contribute to the community. This ensures the platform continues to grow and can be customized to meet users' needs.
How to Use Node-RED:
-
Installation:
-
Building Flows:
- Drag nodes from the toolbar to the canvas and connect them to create a flow.
- Configure the properties of each node by clicking on it and setting the desired parameters.
-
Testing and Deploying Flows:
- Click 'Deploy' to activate the flow. Node-RED will automatically execute the flow when the configured trigger occurs.
- Test the flow by checking if the expected output is generated.
-
Processing Data and Integration:
- Use nodes such as Function, Switch, and Change to process data and add logic to your flow.
- Integrate with external APIs and devices using specific nodes like HTTP-request or MQTT-in.
-
Troubleshooting and Debugging:
- Use the Debug node to monitor the output of a flow and diagnose any issues.
- View the debug tab in the editor to see real-time notifications and output of the flow.
Applications of Node-RED:
- Smart Home Automation: Use Node-RED to connect devices and services and create complex scenarios, such as turning on lights when motion is detected.
- Data Integration and Processing: Automate the collection and processing of data from sensors and APIs.
- IoT Solutions Integration: Connect various IoT devices and systems for advanced automation.
Conclusion:
Node-RED is a powerful tool that enables users to build automations and integrations in a simple way. With its visual interface and extensive capabilities, it is suitable for both beginners and advanced users looking for a flexible way to automate systems and process data.
Step-by-step guide
Here is a step-by-step guide on how to use the Node-RED platform:
Step-by-Step Guide for Using Node-RED:
-
Install Node-RED:
-
Open the Node-RED Editor:
- Open a web browser and go to
http://localhost:1880
to access the Node-RED visual editor.
- The editor displays a blank canvas where you can drag and connect nodes to create flows.
-
Create Your First Flow:
- Drag an Inject node (for input) and a Debug node (for output) from the toolbar onto the canvas.
- Connect the Inject node to the Debug node by clicking on the small triangles and drawing a line between them.
-
Configure Nodes:
- Click on the Inject node to open the settings and set the desired payload (e.g., a message or number).
- Click on the Debug node and configure it to display the full message object or just the payload.
-
Deploy and Test the Flow:
- Click 'Deploy' to activate your flow.
- Click the small button next to the Inject node to run the flow. Check the Debug tab on the right side of the editor to see the output.
-
Add More Nodes and Logic:
- Drag additional nodes such as Function, Change, and Switch onto the canvas to add more advanced logic and data processing.
- Write JavaScript code in the Function node to perform custom operations.
-
Integrate External Devices and Services:
- Use nodes such as HTTP Request, MQTT, and specific API nodes to connect with external devices and services.
- Configure the API settings or MQTT broker details by clicking on the node and entering the required parameters.
-
Troubleshoot and Debug:
- Add Debug nodes at critical points in the flow to check how data is being processed.
- Review the Debug panel for error messages and output to troubleshoot issues.
-
Save and Export Your Work:
- Click the menu in the top right corner of the editor and choose 'Export' to save your flow as a JSON file.
- Import saved flows later by using the same option and pasting the JSON code.
-
Automate and Scale Your Projects:
- Create more complex flows by adding various nodes and conditional logic.
- Use Scheduler or cron-like nodes to run automated tasks at specific times.
Tips:
- Use the Node-RED Library: Search for additional nodes and plugins in the Node-RED library to expand your project.
- Community Support: Join the Node-RED community for assistance, ideas, and tutorials.
With this step-by-step guide, you can easily start building automations and integrations with Node-RED.
OpenHAB
OpenHAB (Open Home Automation Bus) is an open-source platform for automating and managing smart home devices. It is designed to provide a central control hub for various devices and systems from different manufacturers, making it a powerful solution for those seeking a unified way to manage their smart home.

Features of OpenHAB:
-
Platform Independent: OpenHAB is written in Java and can run on various operating systems such as Windows, macOS, Linux, and even on devices like a Raspberry Pi. This makes the platform accessible and flexible for different types of users.
-
Support for Multiple Protocols: OpenHAB supports a wide range of protocols and standards, including Zigbee, Z-Wave, KNX, MQTT, and more. This means users can integrate and control devices from different brands and technologies from a single platform.
-
Modular Architecture: The platform uses add-ons and bindings to integrate new devices and services. This modular design allows users to install only the components needed for their specific setup, helping to keep the system lightweight and organized.
-
Rule-Based Automation: OpenHAB offers powerful capabilities for setting up rules and automations. Users can create advanced scenarios, such as automatically turning off all lights and activating the alarm system when everyone leaves the house.
-
Open-Source and Active Community: As an open-source project, OpenHAB has an active community of developers and users contributing to the growth and improvement of the platform. This ensures that the platform is constantly updated with new features and integrations.
-
User-Friendly Interfaces: OpenHAB offers various interfaces for users, including the Paper UI, Basic UI, and HABPanel. These interfaces make it easy to manage devices, create dashboards, and set up automations.
How to Use OpenHAB:
-
Installation:
- Download OpenHAB from the official website and install it on your chosen platform.
- For use on a Raspberry Pi, you can use OpenHABian, a pre-configured version of OpenHAB that is easy to install.
-
Configuration:
- Start OpenHAB and access the web interface via
http://<IP address>:8080
.
- Configure your installation by adding bindings to connect devices. This can be done easily through the Paper UI or by manually editing configuration files.
-
Add Devices:
- Add devices by linking them with the bindings you have installed. For example, use the Zigbee binding to connect and manage Zigbee devices.
-
Set Up Automations and Rules:
- Create rules and automations to perform actions automatically based on conditions. This can be done through the Paper UI or using OpenHAB's rule scripting.
- Use the Rules DSL or the built-in Blockly editor for visual rules.
-
Create Dashboards and Interfaces:
- Customize your user experience by creating dashboards with HABPanel. This allows you to create visually appealing and functional control panels for devices and automations.
-
Updates and Maintenance:
- Regularly check for updates to keep your installation up-to-date with the latest features and security patches.
- Make regular backups of your configuration to keep your data safe.
Applications of OpenHAB:
- Centralized Control of Smart Home Devices: Manage devices from various manufacturers, such as smart lights, thermostats, and security systems, from a single platform.
- Advanced Automations: Set up complex rules to automate actions based on time, presence, sensor data, and more.
- Integration with Voice Assistants: Connect OpenHAB with Google Assistant and Amazon Alexa for voice-controlled management.
Conclusion:
OpenHAB is a versatile and powerful platform for those seeking a comprehensive solution to automate and manage their smart home. With support for a wide range of devices and a flexible, modular structure, OpenHAB is suitable for both beginners and advanced users who want full control over their smart devices and automations.
Step-by-step guide
Here is a step-by-step guide on how to use the OpenHAB platform:
Step-by-Step Guide for Using OpenHAB:
-
Download and Install OpenHAB:
- Visit the official OpenHAB website and download the version compatible with your operating system.
- Follow the installation instructions for your specific platform (e.g., using a package manager on Linux or manual installation on Windows/macOS).
- For an easier installation on a Raspberry Pi, use OpenHABian, a pre-configured image that can be flashed to an SD card.
-
Start the OpenHAB Server:
-
Configure Basic Settings:
- Follow the setup wizard in the web interface to configure basic settings such as language and location.
- Create a user account to access the interface and settings.
-
Add Bindings:
- Go to 'Settings' > 'Add-ons' > 'Bindings' and install bindings for the devices and services you wish to integrate, such as Zigbee, Z-Wave, or MQTT.
- A binding acts as an interface between OpenHAB and your smart devices.
-
Add Devices (Things):
- Navigate to 'Settings' > 'Things' and click on 'Add' to add new devices. OpenHAB will automatically detect devices that match the installed bindings.
- Follow the steps to pair devices and make them available in OpenHAB.
-
Create Items:
- Items in OpenHAB represent different properties of your devices, such as turning a light on or off.
- Link items to the added devices (Things) to control them. This can be done through the web interface or by editing configuration files.
-
Set Up Rules and Automations:
- Go to 'Settings' > 'Rules' to create new rules that perform actions automatically based on certain conditions.
- Use the built-in Blockly editor for visual automations or write rules in Rules DSL for more complexity.
- For example, set up a rule to turn on the lights when a motion sensor detects movement.
-
Create and Customize Dashboards:
- Use HABPanel or the Basic UI to create dashboards for controlling devices and visualizing data.
- Customize the layout and widgets to create a clear control panel that meets your needs.
-
Test Your Configuration and Optimize:
- Test your settings by using the rules and devices to see if they work as expected.
- Adjust rules and automations to improve functionality or add new scenarios.
-
Maintenance and Updates:
- Keep OpenHAB up-to-date by regularly installing new versions. This helps you access the latest features and security updates.
- Make backups of your configuration to ensure that your data is safe and can be easily restored.
Tips for Use:
- Leverage the OpenHAB Community: Join the OpenHAB community for support, ideas, and sharing experiences.
- Use the Documentation: The official OpenHAB documentation provides detailed explanations of all aspects of the platform.
With this step-by-step guide, you can easily start using OpenHAB to manage your smart devices and create advanced automations for your smart home.