Quickstart with the IoT Cube (by Fabian Reifler)

Quickstart with the IoT Cube

1. Overview

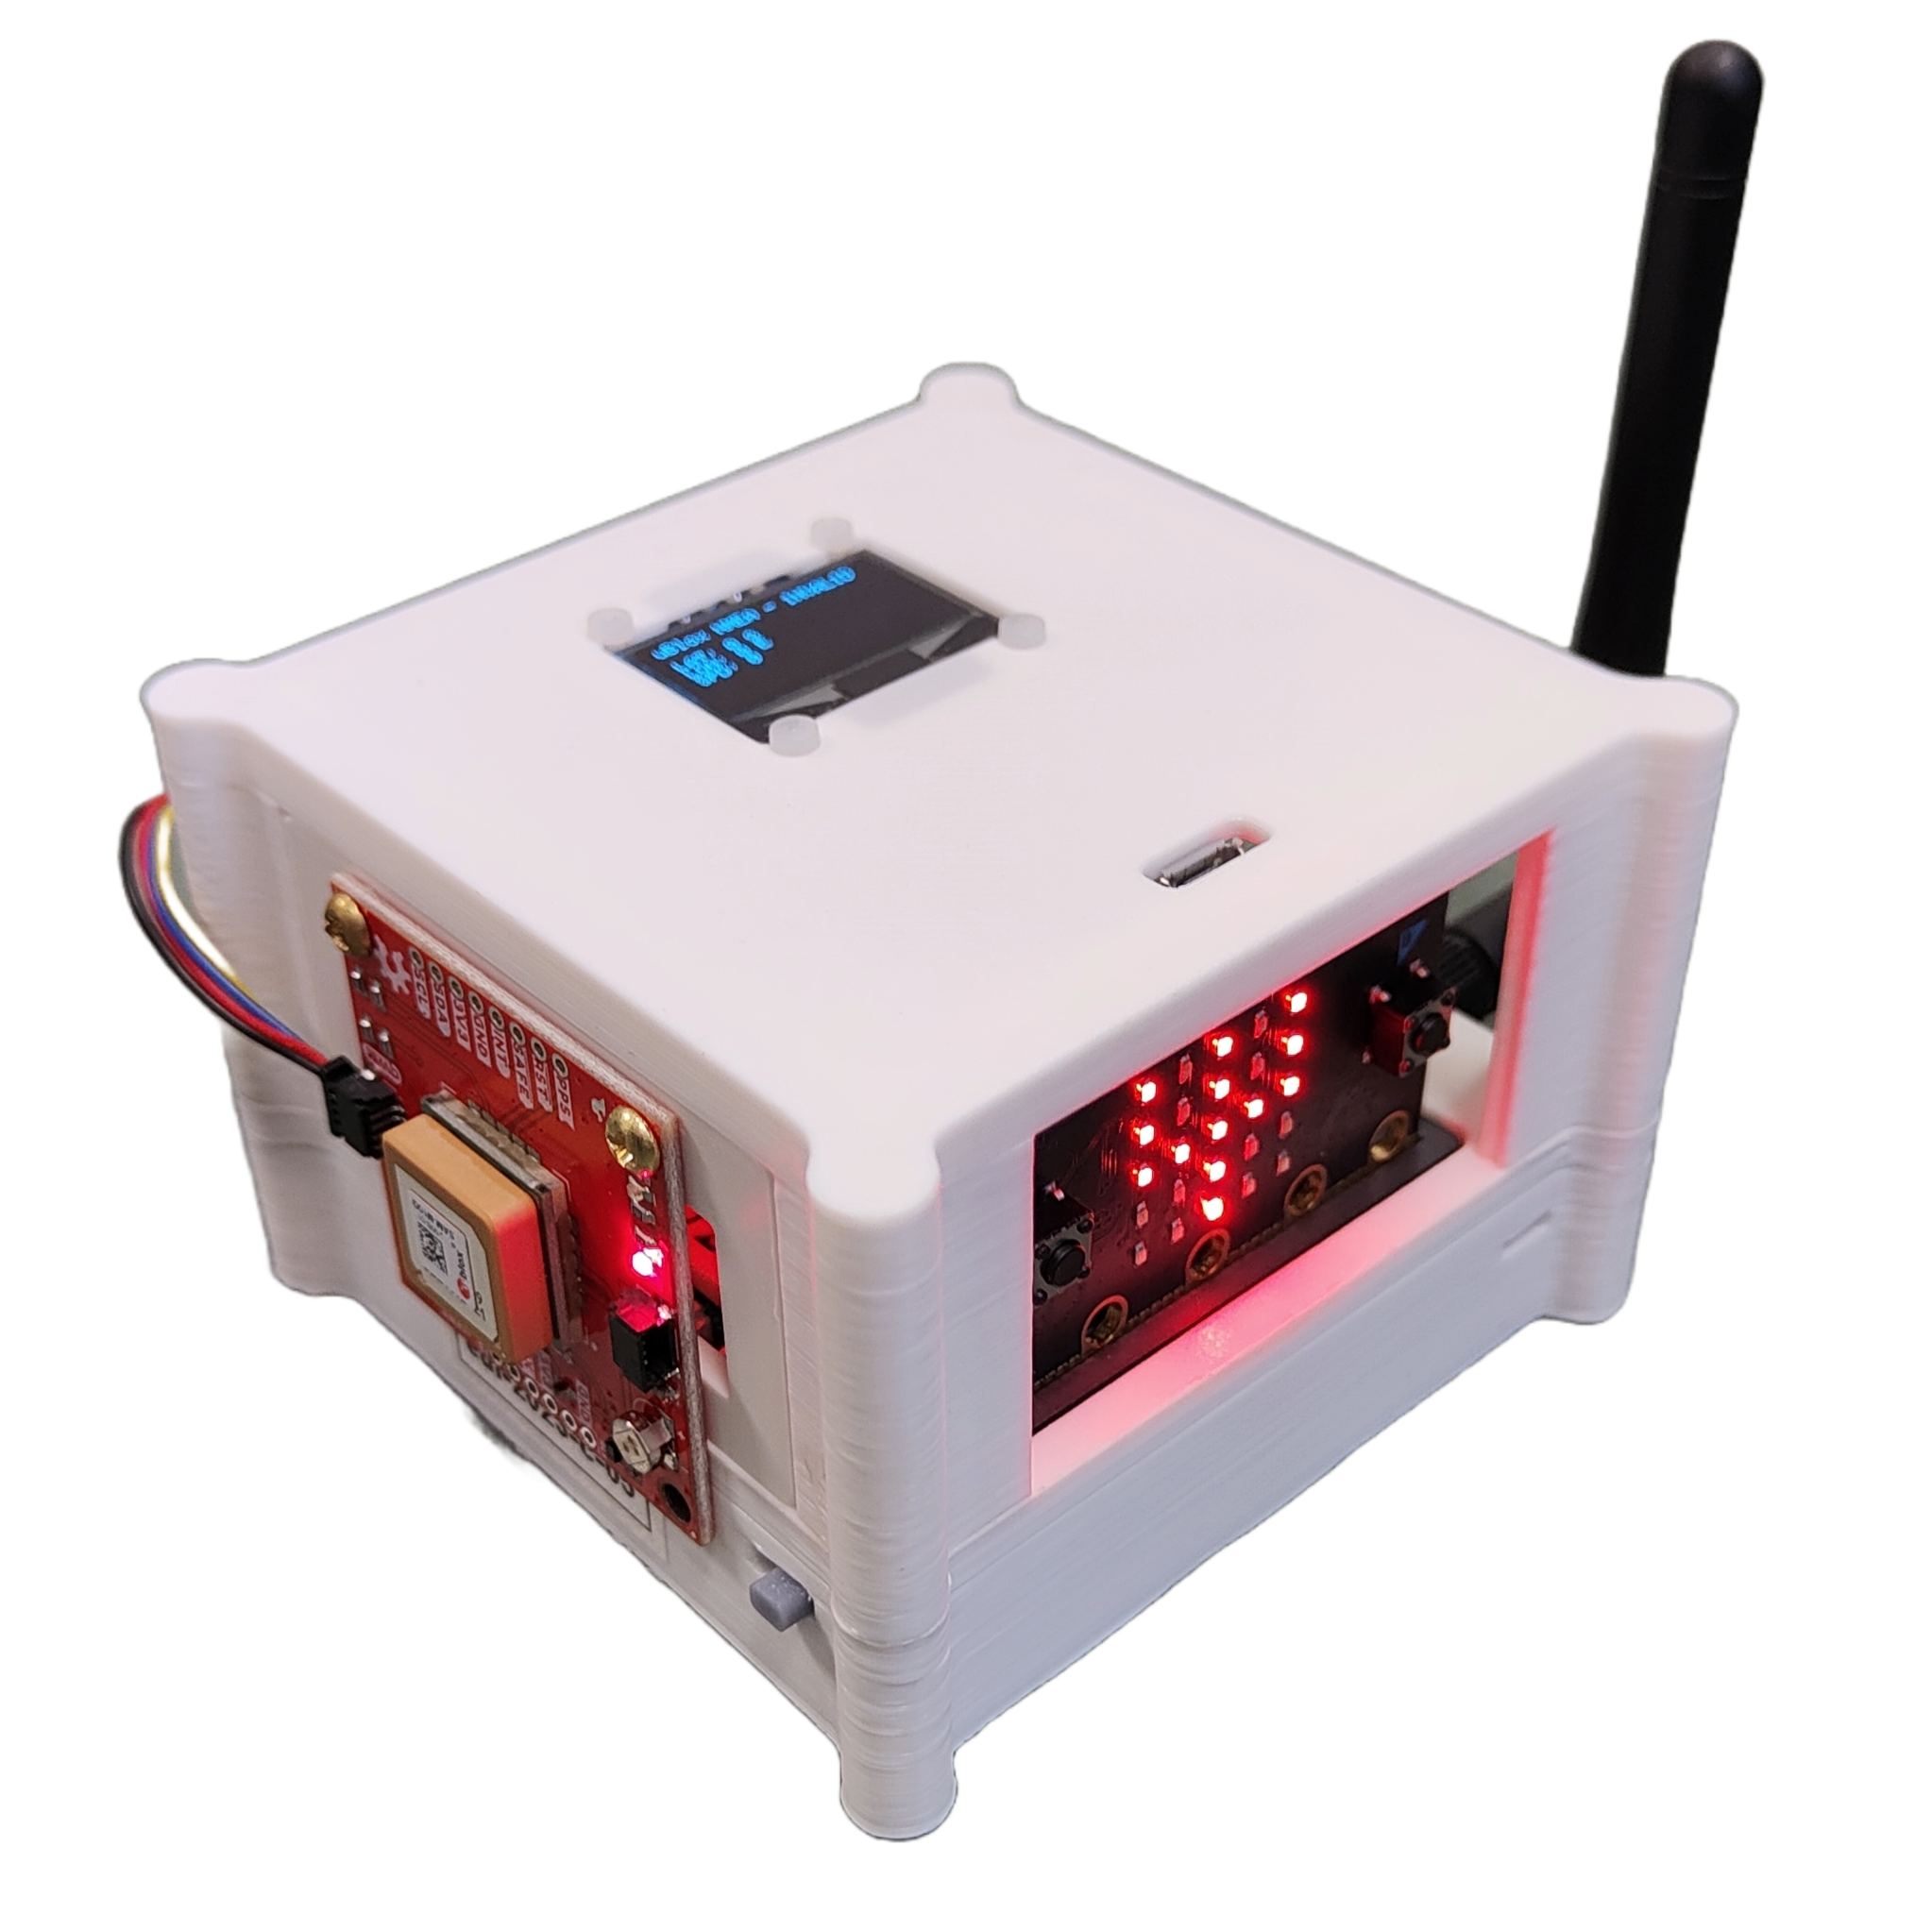
This article explains the first steps in programming the LoRaWAN-capable IoT Cube. The IoT Cube comes in a box with various sensors and actuators. Each Cube is labelled with a number when you look at the IoT Cube from the side, eg. eui-2023-c-05. The number is important for finding your measurement data on the internet. With the IoT (internet of things), we want to measure „things“ in our environment and send them to the internet. We can then process our measurement data online and display it on a map, for example. We can also trigger alarms and send something back to our IoT cube, for example to control a greenhouse or top up feed in a birdhouse.

Most common applications:

  • Recording measurement data and sending it to the cloud
  • Count people or events and send them to the cloud
IoT Cube
Image: IoT Cube with GNNS Module

Learning objectives

You will lern with the article Quickstart with the IoT Cube

  • how to create a project in makeCode
  • how to load extensions (e.g. for sensors and actors)
  • how to edit and download a program to the iot cube.
  • how to create dashboards on ThingsBoard to visualise data.

Fabian Reifler | Copyright © 2024

2. Create a project and load extensions

To program the IoT Cube, you need the following web application:

https://makecode.microbit.org

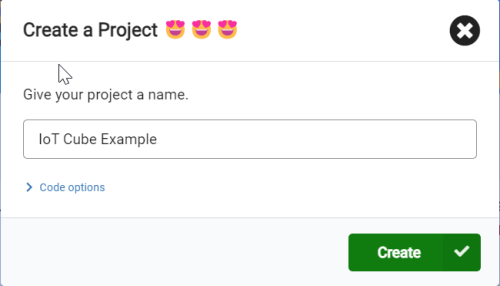
Create a new project and choose any name:

​​

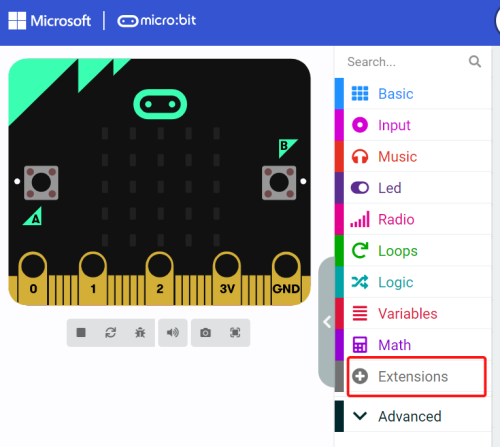
To support the IoT Cube, you need to load an extension. Proceed as follows:

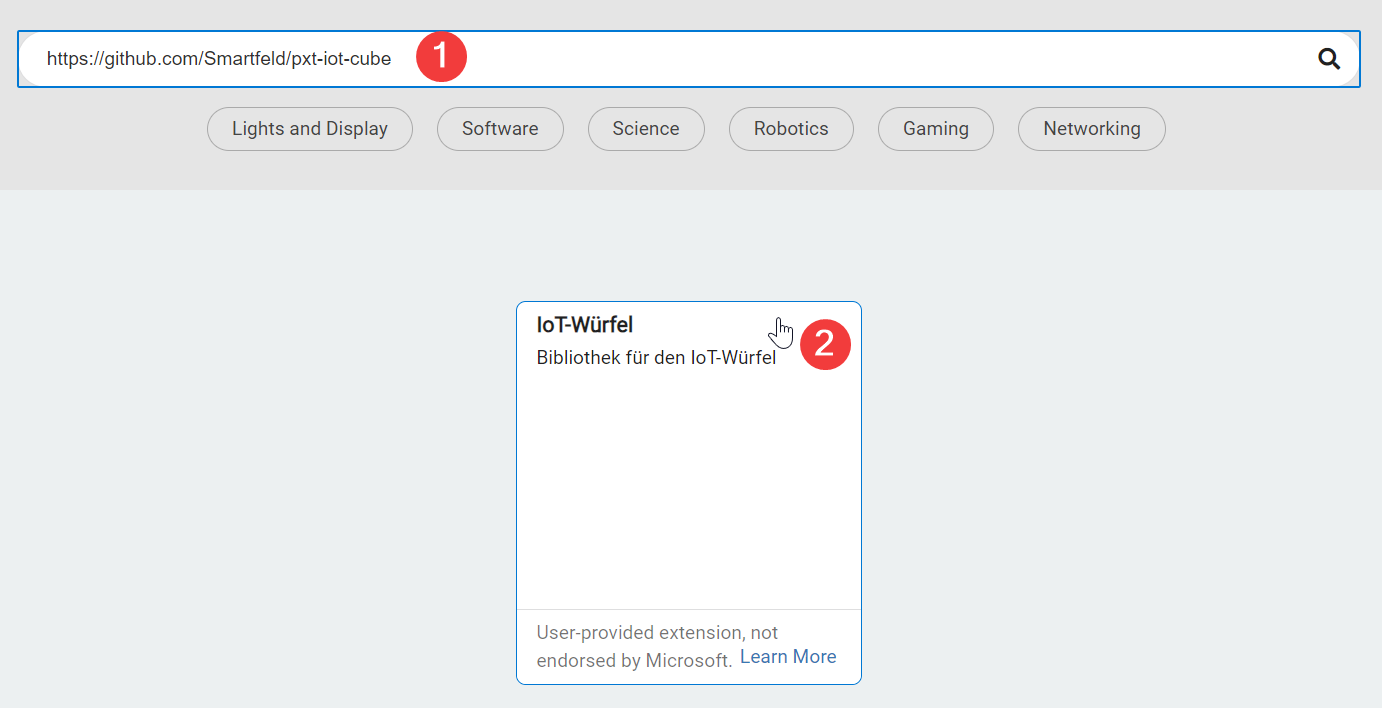
Copy the following path into the search field and press ENTER.

https://github.com/Smartfeld/pxt-iot-cube

Click on the extension to install it.

To support more sensors and actors, that are included in the IoT- Cube Box, repeat the procedure with this two paths:

Some sensors and actors:

https://github.com/Smartfeld/pxt-sensorikAktorikSmartfeld

GPS Module:

https://github.com/Smartfeld/pxt-ubx-gnss/

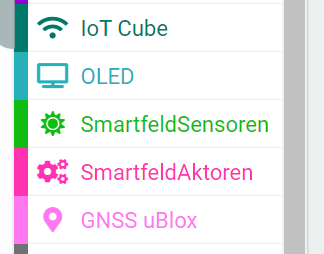
After loading the extensions, the following blocks should be available:


Fabian Reifler | Copyright © 2024

3. Example 1 with light level

Goal

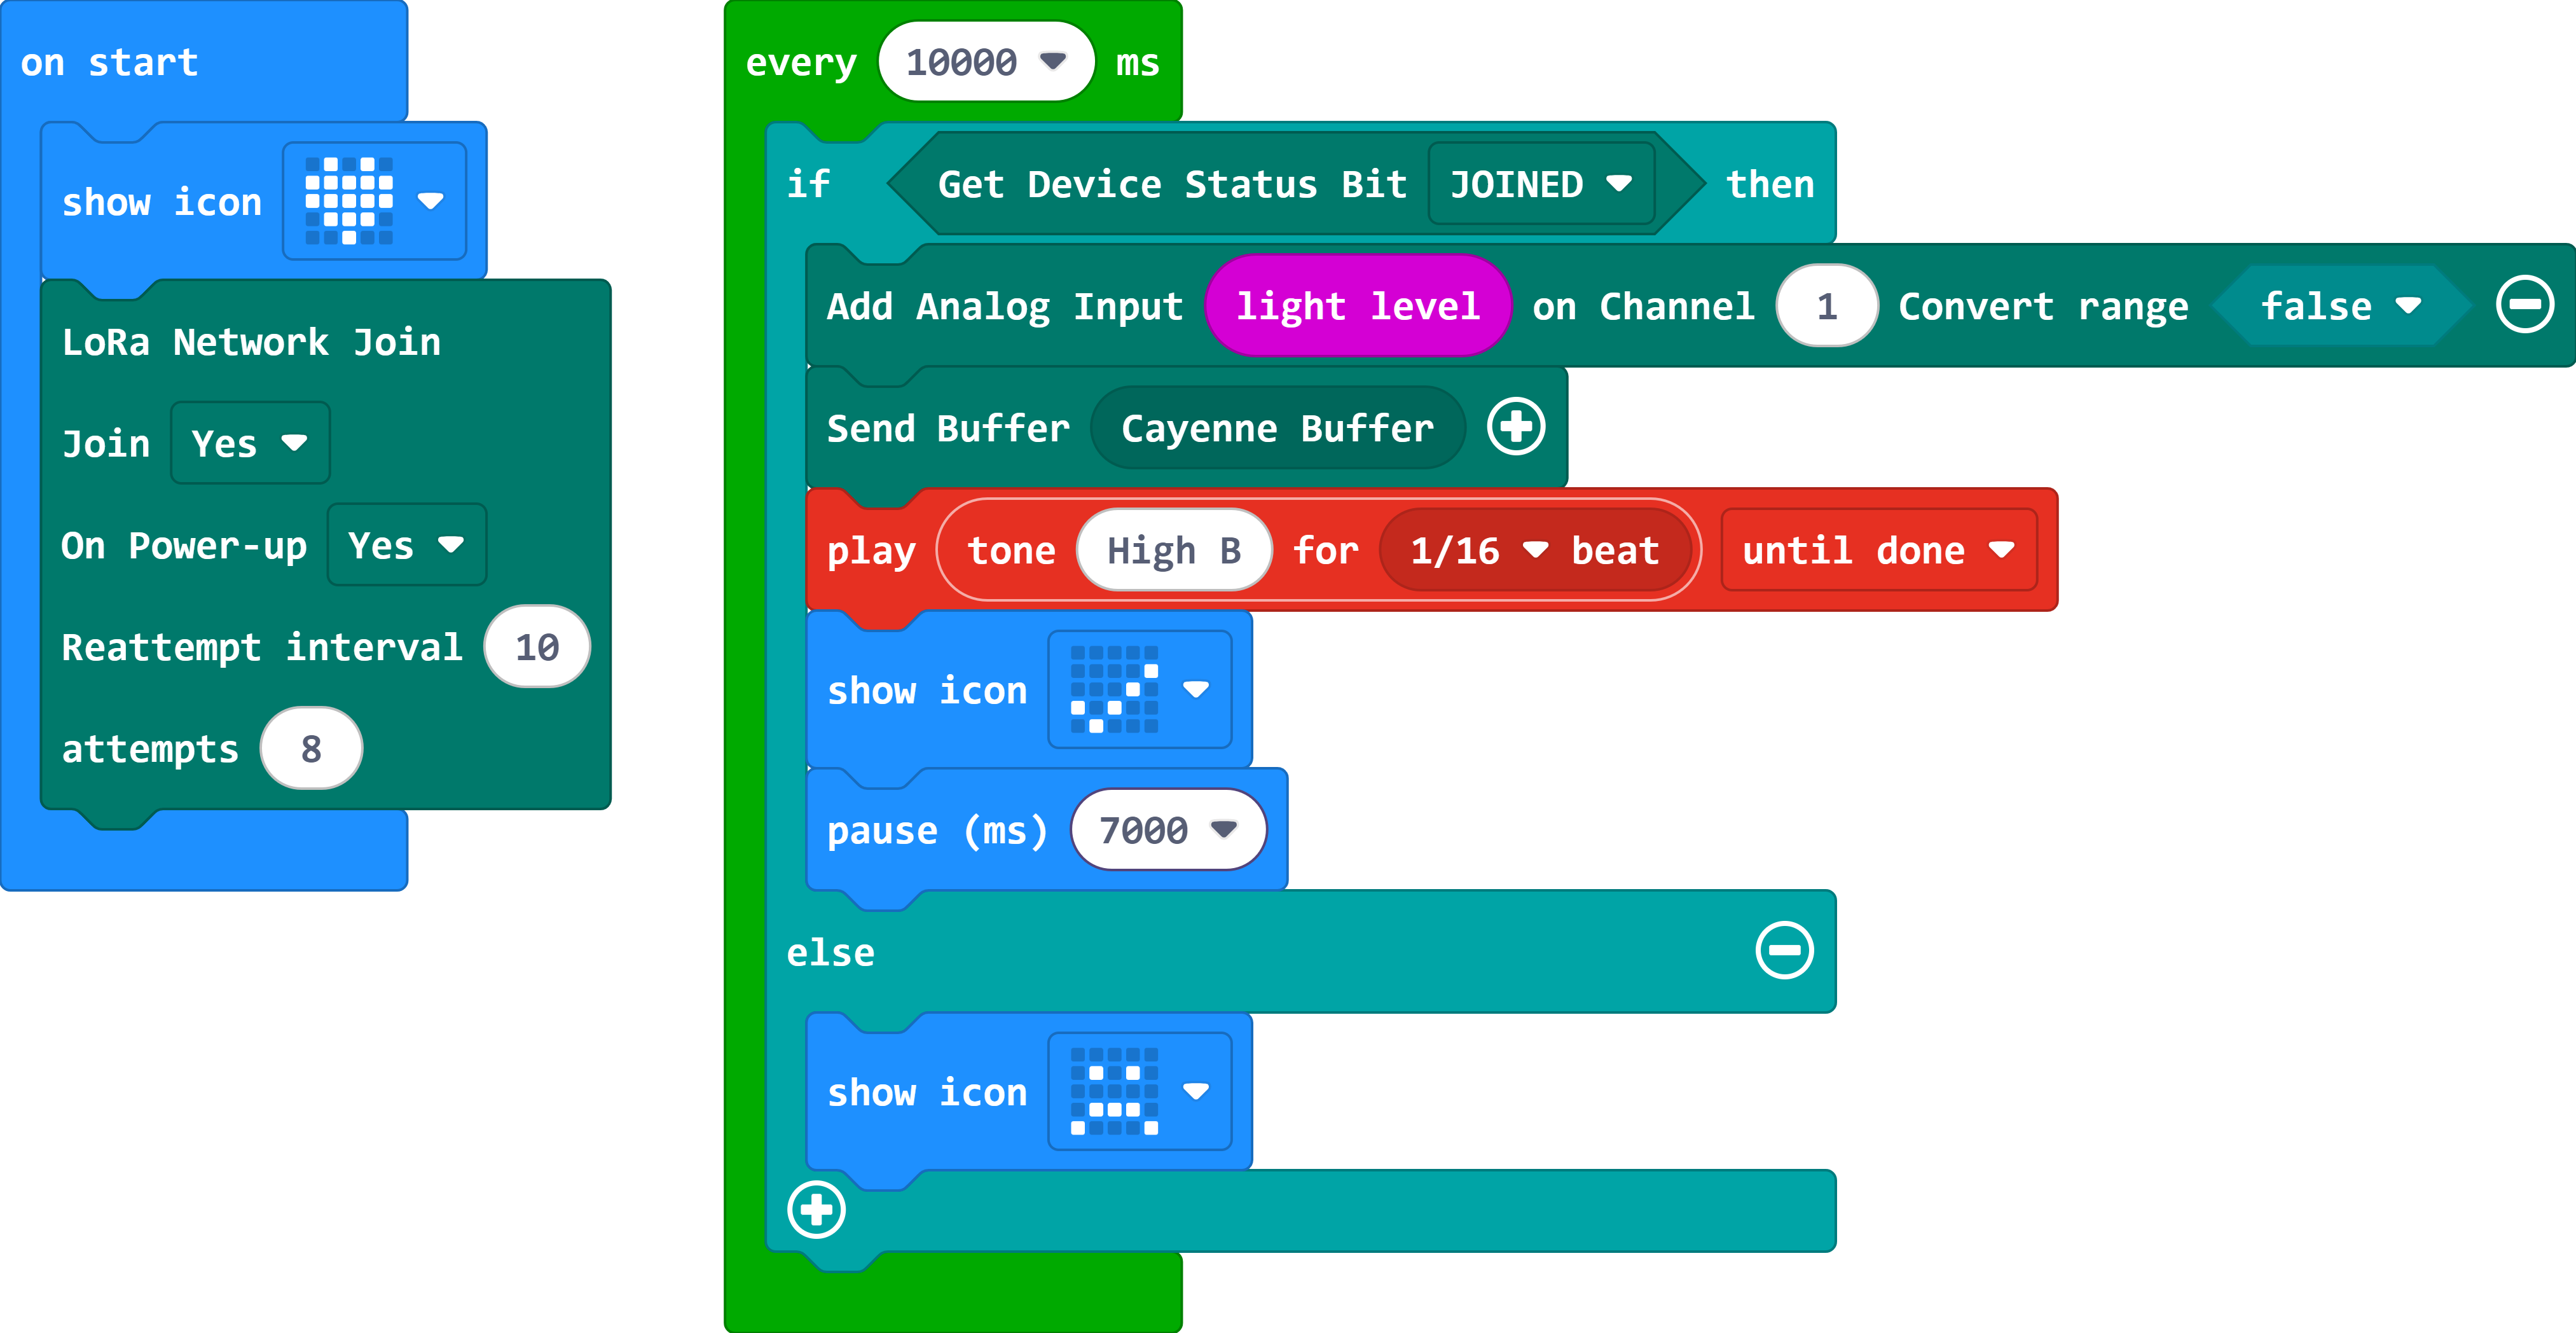
As a first example, we want to send a light level via LoRaWAN. The Micro:Bit can measure the light intensity via the LEDs on the front. We will transmit the value every 30 Seconds.

Hardware

  • Connect the Y USB Cable to the IoT Cube

    • the plug marked red on the back of the housing (only power)

    • the other one to the micro:bit on the top of the housing (power + data)

  • Connect the USB-A Connector with your computer

Software for the IoT Cube

Try to recreate this example. You will need nodes from the following categories. The colors help you to choose the right category.

2.4 Integration on things board

You now create a dashboard to display the values. Proceed as follows:

  • Click here to open our cloud platform: Clavis Cloud (ThingsBoard)

  • Login with the Email iot@KC.ch. You will get the password from Fabian Reifler.

  • Click on Dashboards → Groups →  Dashboards-Students-IoT-Cube

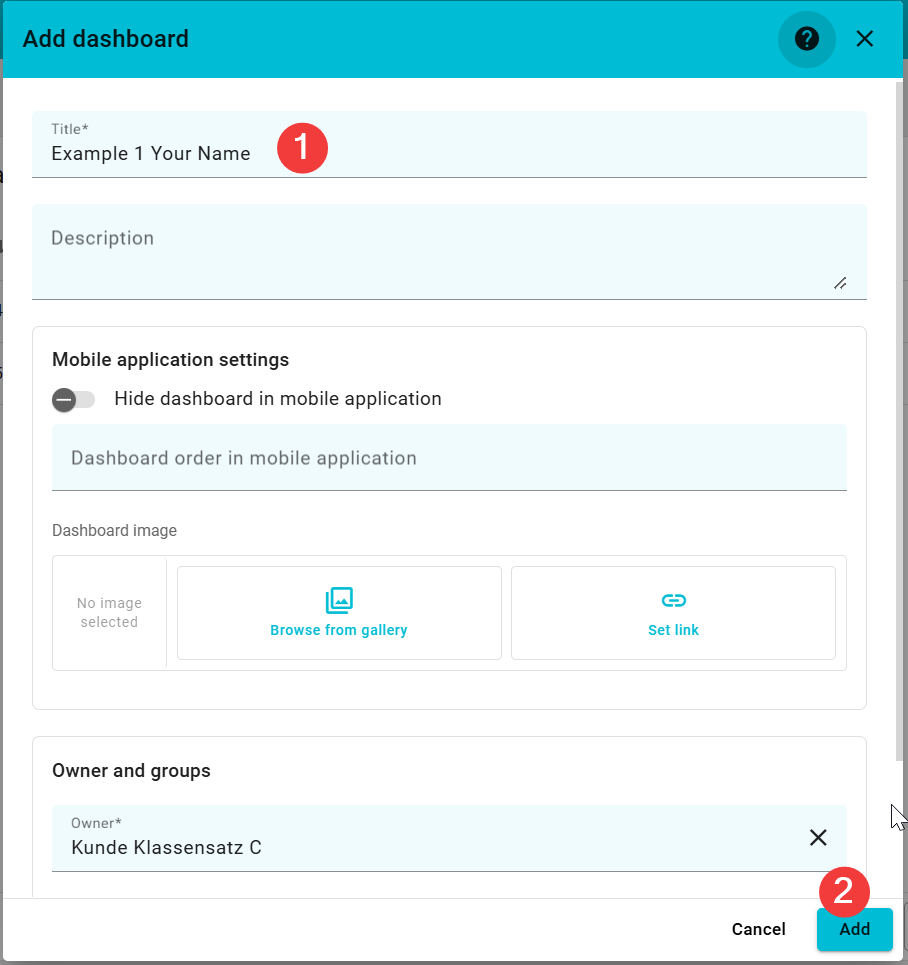
  • Click on Add Dashboard
  • Give a Title like "Example 1 Your Name"
  • Click on Add new widget
  • Select widget bundle Charts
  • Select Time series chart
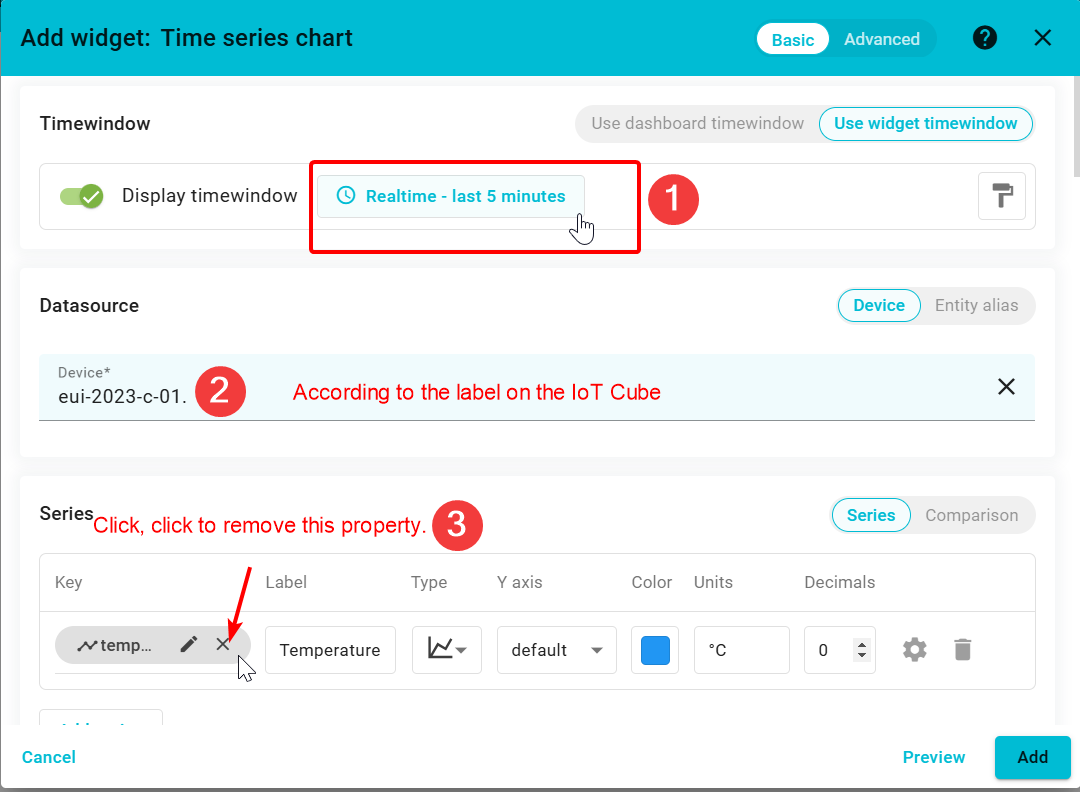
  • Settings like that:
  • Click Apply
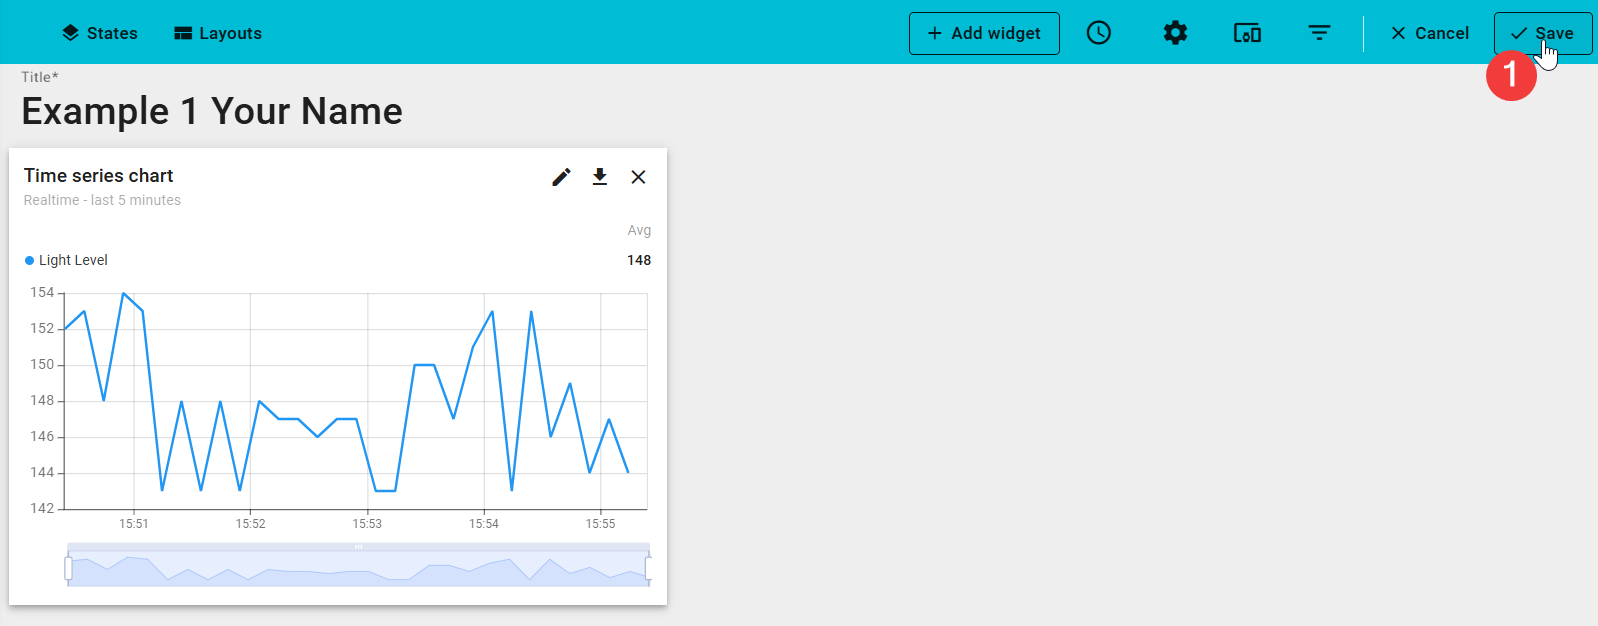
  • Don't forget to click Save

So, that was the short version. But why does the data arrive here so easily? Take a look at the next chapter.

Fabian Reifler | Copyright © 2024

4. Data flow: Cube → TTN → ThingsBoard

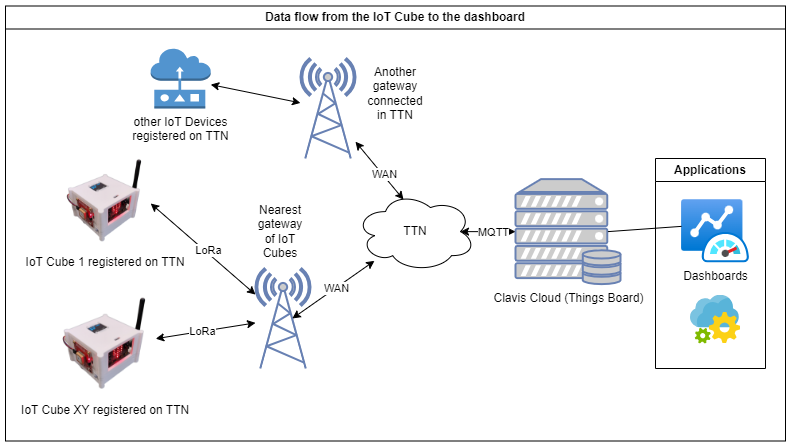
Simplified, the data flow can look like this:

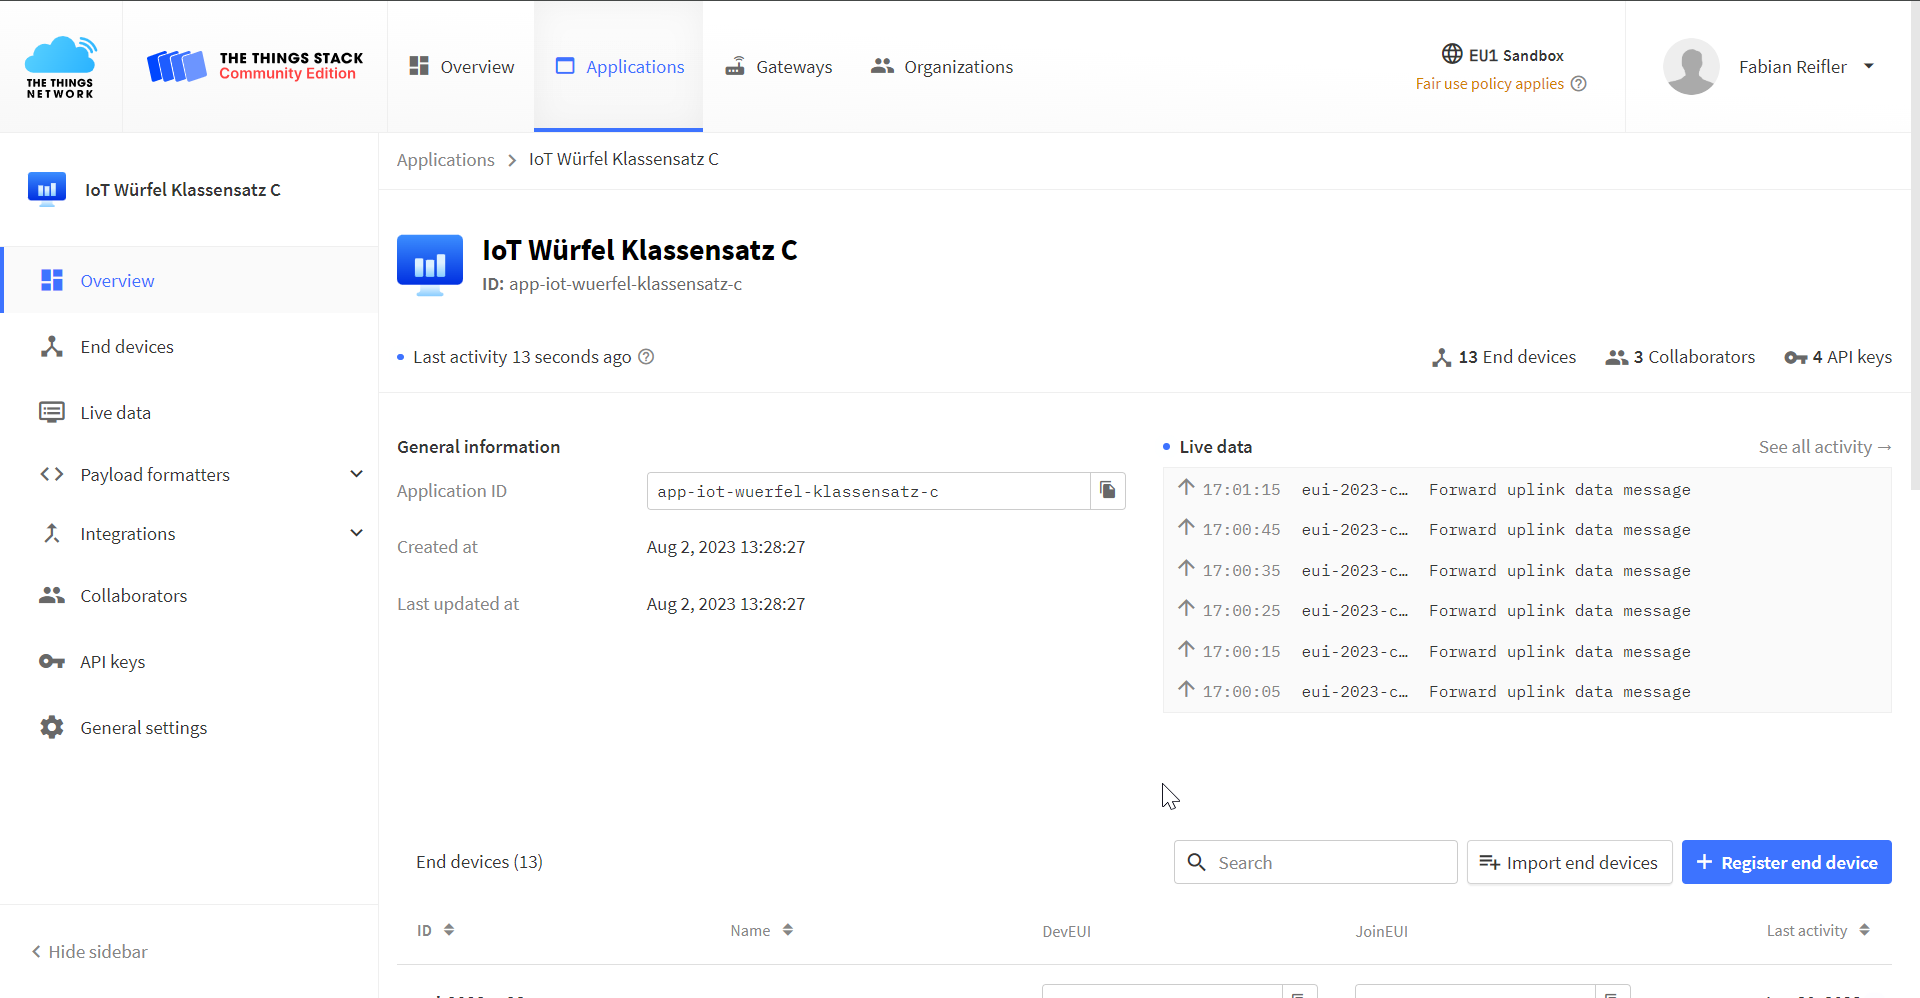
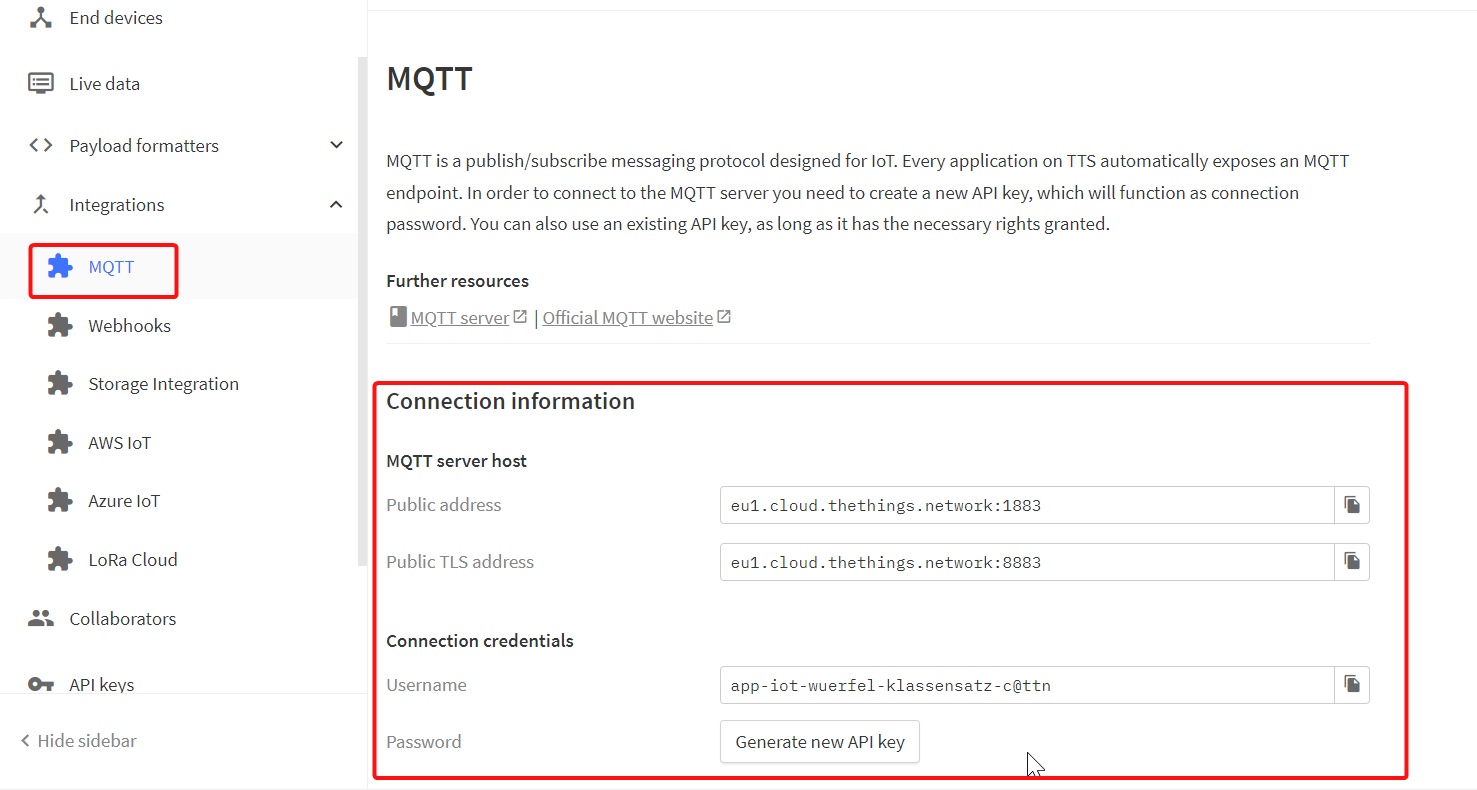
Your measurement data from the IoT Cubes has been transmitted to the Internet, as these devices are already registered with The Things Network (TTN). You can access and view your live data on the TTN Console. If you're interested in this aspect, please visit the TTN Console. If you do not have a TTN account, create one TTN Login and contact Fabian Reifler to be added as a collaborator. The TTN Console looks like that:

TTN 1) serves as a LoRaWAN Network Server, connecting all LoRaWAN gateways and edge devices. It's important to note that data is not permanently stored on TTN but is forwarded. Currently, TTN forwards your measurement data using MQTT 2):

The data is retrievable via MQTT, which we implement using ClavisCloud. ClavisCloud is a hosted version of the open-source software ThingsBoard. It archives every message and provides functionality to create dashboards for visualizing the data.

Fabian Reifler | Copyright © 2024

5. Example 2 with Slider

Goal

Now we want to connect a sliding Potentiometer to the IoT Cube. Whenever the slider is moved, a value is to be transmitted via LoRaWAN. The value can be used for various scenarios, e.g. to dim a remote smart light. The value is also shown on the OLED display.

Hardware

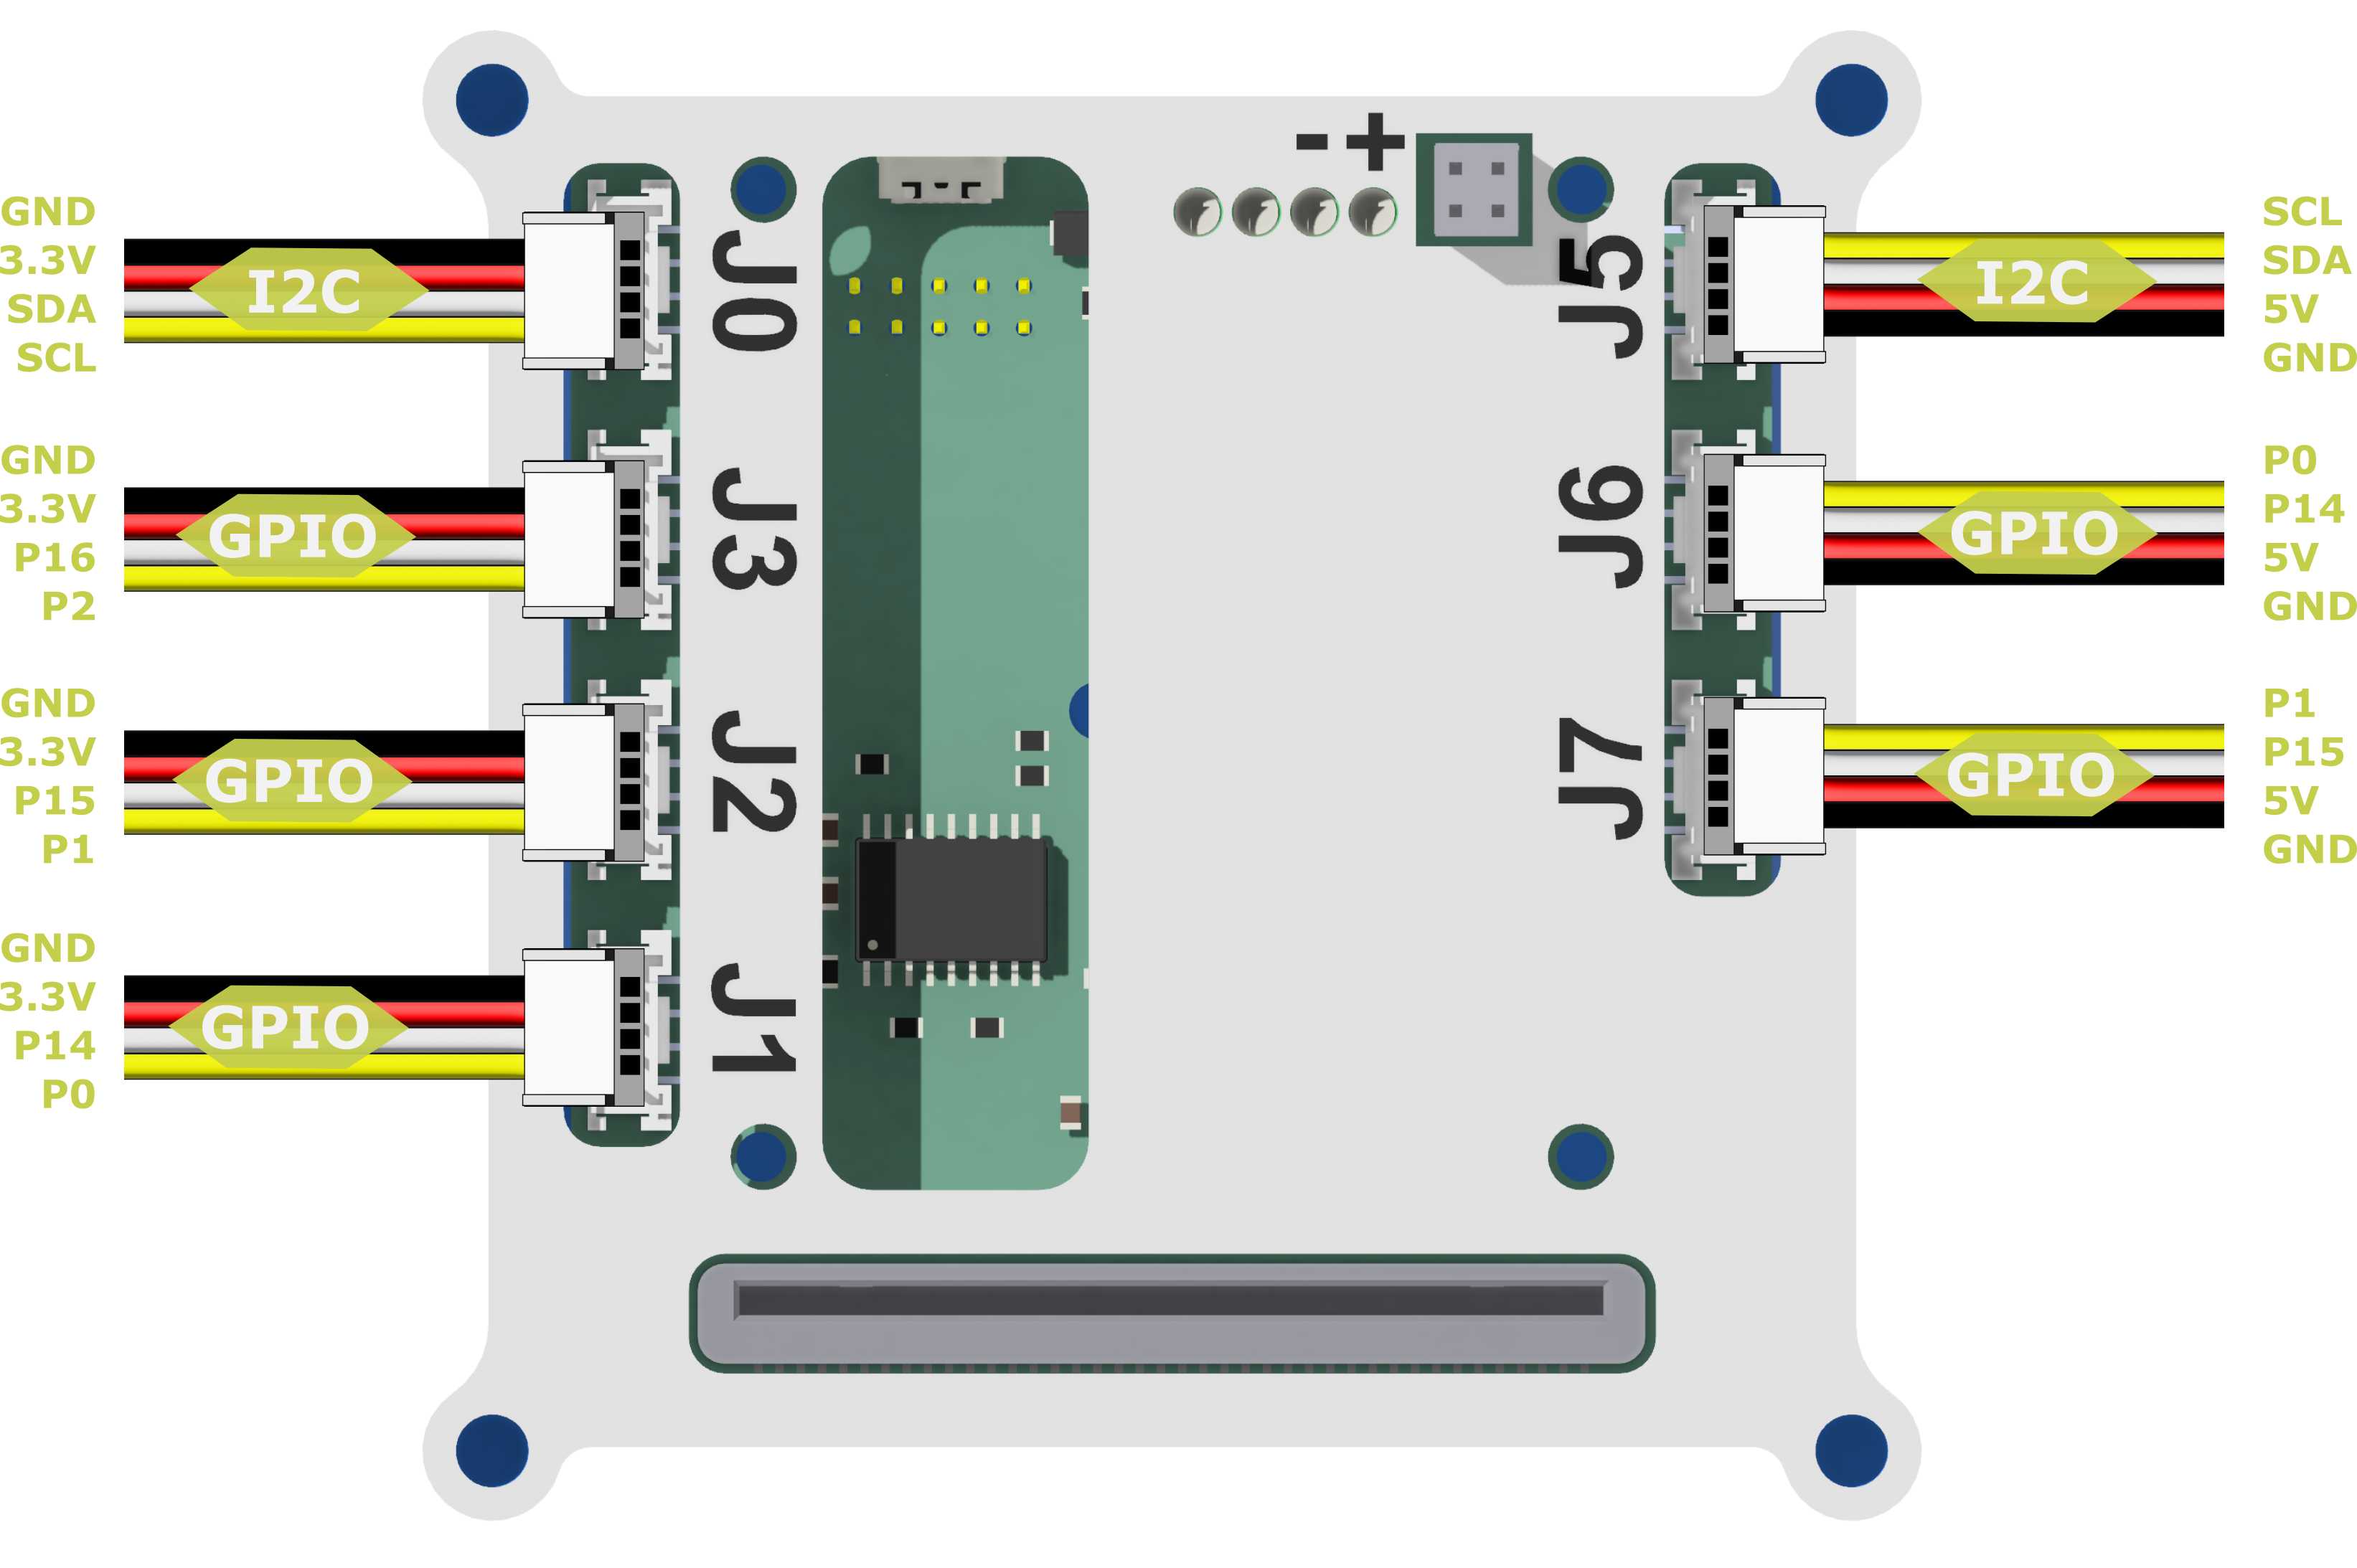
  • Connect the display to J5 (I2C 5V)
  • Connect the Sliding Potentiometer to the IoT Cube. You can use J3 (Pin P2 3.3V). Pin P2 can be used to read analog values.
  • Connect the Y USB Cable to the IoT Cube
    • the plug marked red on the back of the housing (only power)
    • the other one to the micro:bit on the top of the housing (power + data)
  • Connect the USB-A Connector with your computer

Be careful when connecting other sensors to J5, J6 and J7. J5 to J7 have a 5V supply voltage. 3.3V devices can be damaged. Use J3, if you are using analog sensors, like the UV- Sensor in the box.

Software for the IoT Cube

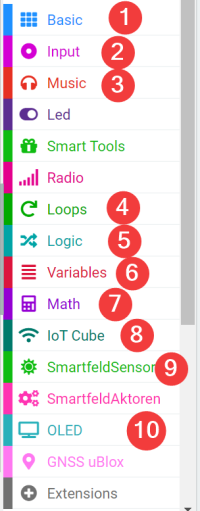
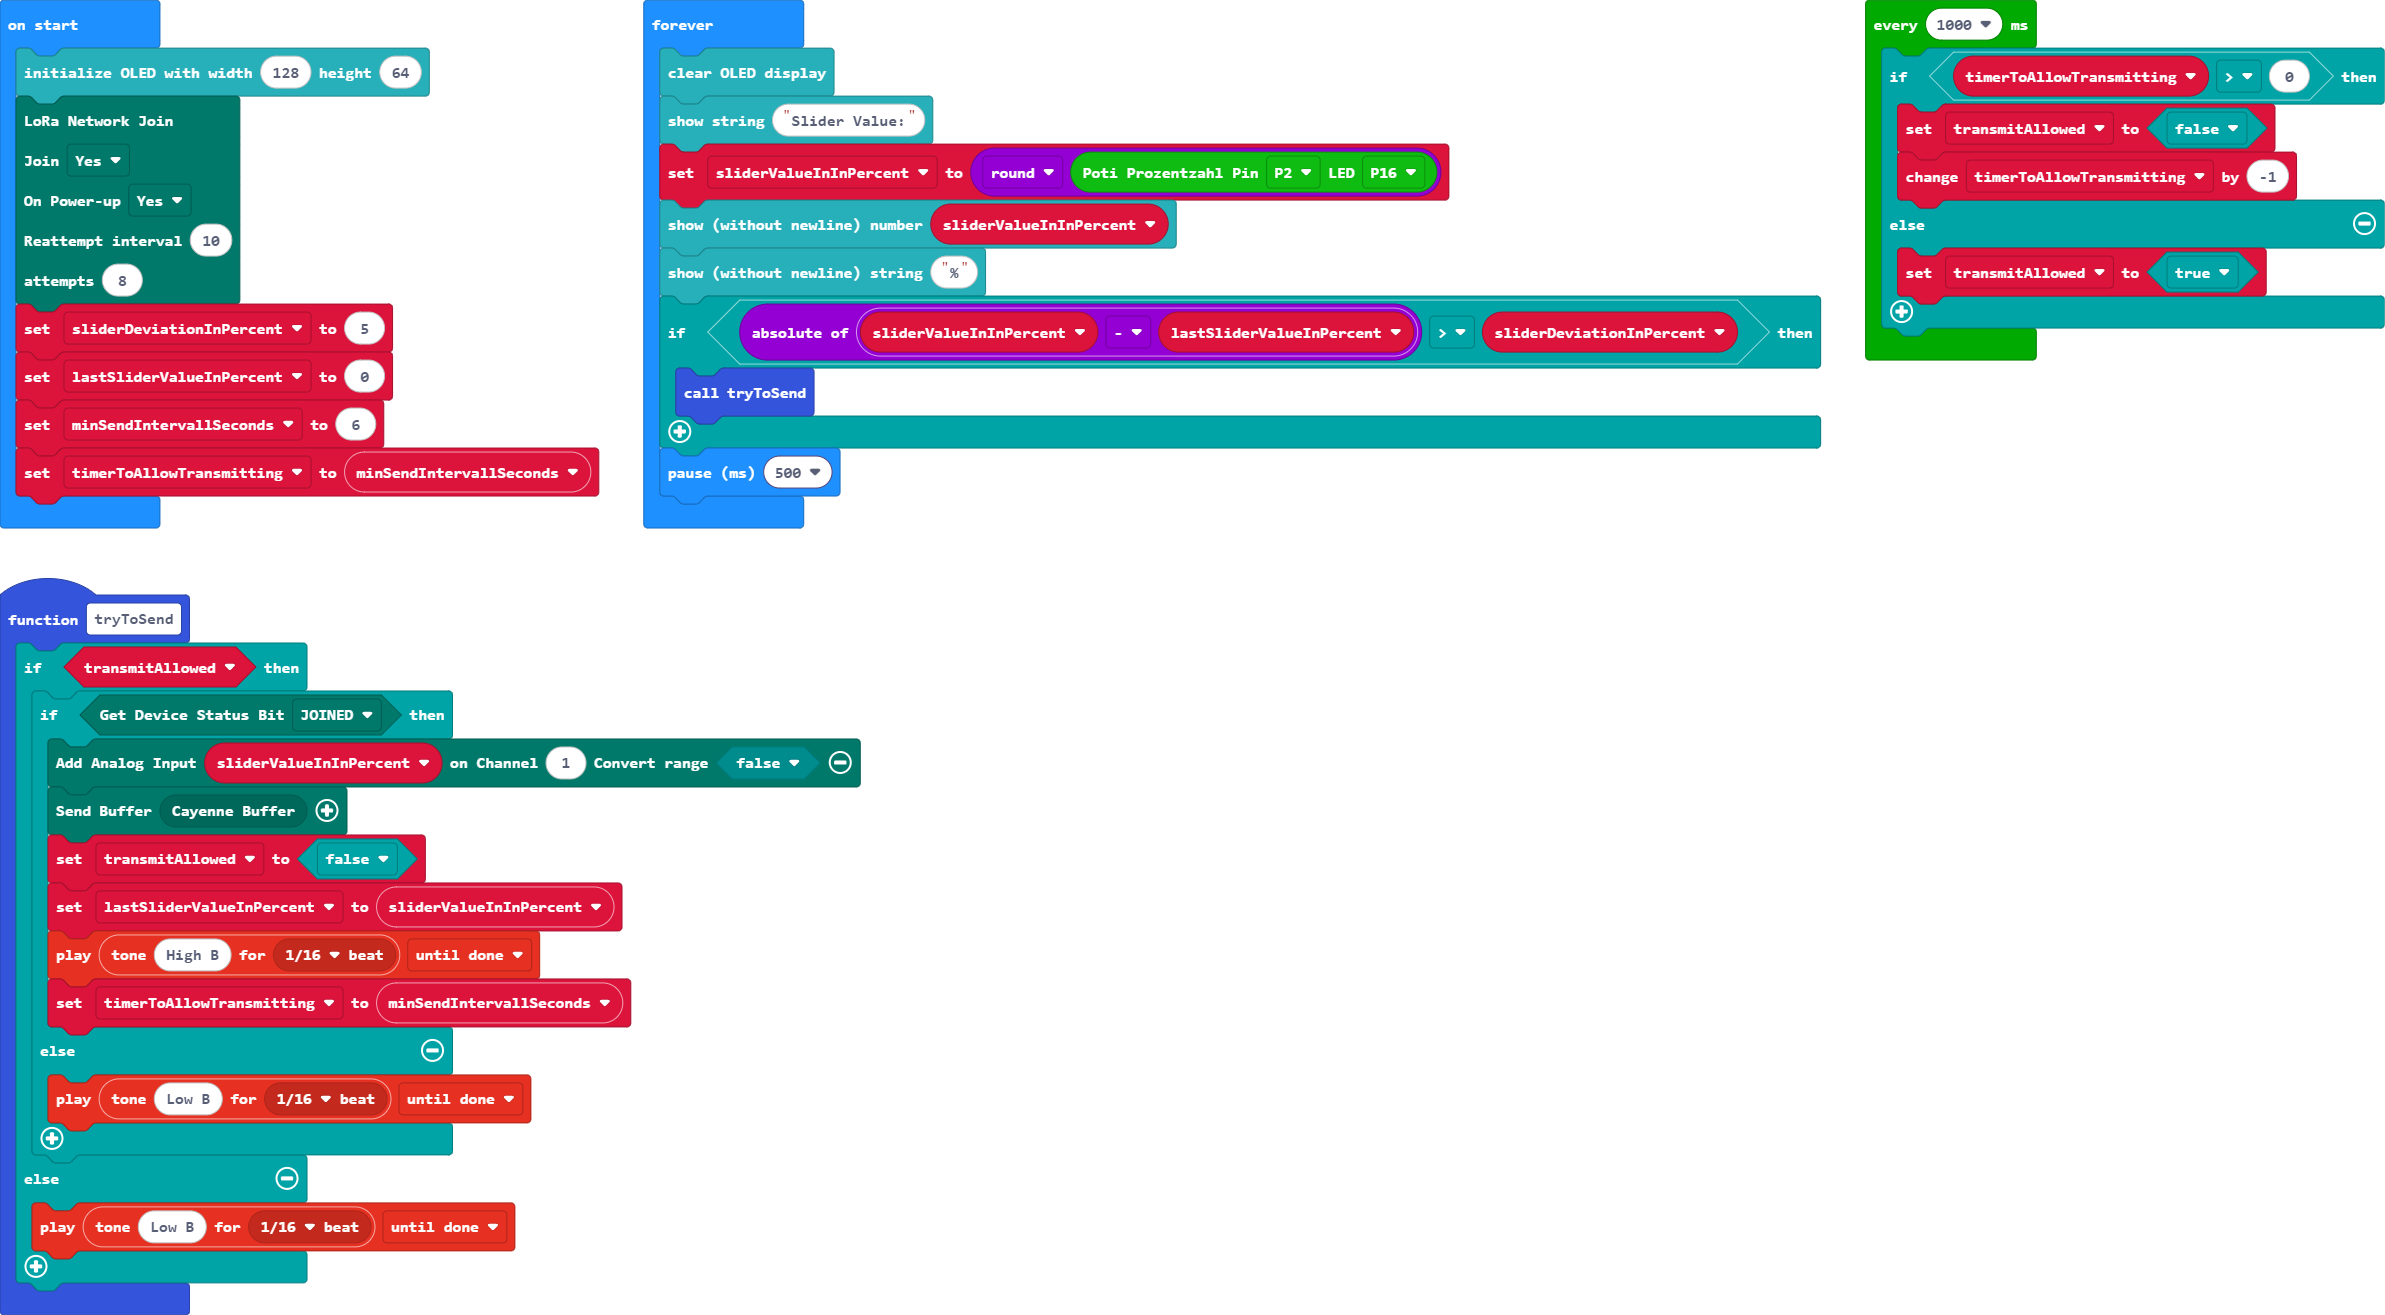
Try to recreate this example. You will need nodes from the following categories. The colors help you to choose the right category:

Before you despair, you can also use this ready-made example: Shared Example 2

Explanations

In the current configuration of the IoT Cubes, transmission is only possible approx. every 6 seconds. Shorter intervals are therefore prevented with a simple timer. When moving the slider, the system first checks whether the value has changed. If so, the program attempts to send the data. However, this is only possible if the IoT Cube has joined the network and nothing has been sent in the last six seconds. Compared to the first example, the edge device acts more intelligently here. Data is only sent if something has changed. This saves energy and extends the battery life.

Intelligent edge devices in IoT (Internet of Things) are crucial components for modern smart systems. These devices have several key features that make them “intelligent” and efficient for various applications.
  • Energy Efficiency: Think about when it is really necessary to send data. Every transmission costs energy.
  • Data Processing Capabilities: Unlike traditional IoT devices that rely solely on cloud servers for data processing, intelligent edge devices have the capability to process data locally. This reduces latency, as data doesn't need to travel to a central server and back, and it can also operate in environments with limited or no connectivity.

Integration on things board

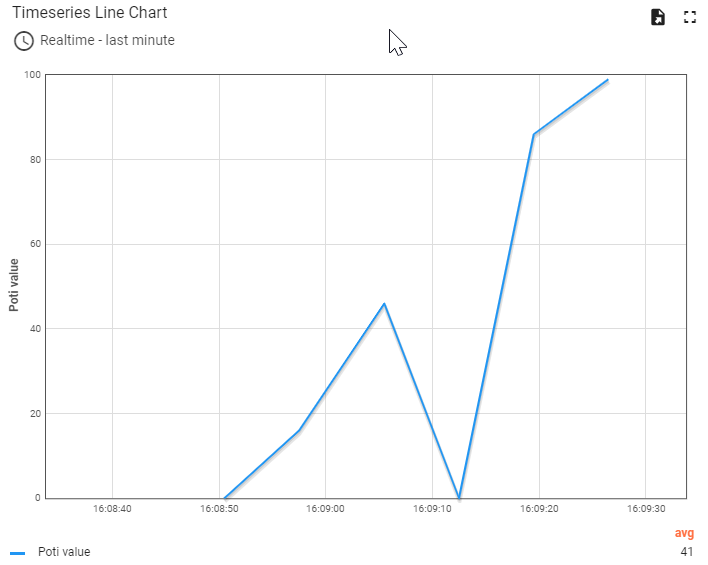
Proceed in the same way as in example 1: Go to the website againClavis Cloud (ThingsBoard) and create a suitable dashboard!

Exercise

Try to combine the two examples so that the light measurement and the potentiometer measurement are made on the same IoT cube.

Tipp: You can add more than one sensor value to the buffer and transmit them together. Like this:


If you use Channel 2 instead of Channel 1, the data key looks like the one in the Clavis Cloud (ThingsBoard):


Fabian Reifler | Copyright © 2024

6. Counting Events

It is often necessary to count things, such as people walking past. If you want to do something along these lines later in your project, I recommend you take a closer look at this example:

https://makecode.microbit.org/_9fVKYs5ygUgu

On the hardware side, you have to connect the ultrasonic distance sensor to J1:

Overall, this code detects proximity events with a ultrasonic- sensor and periodically sends the detection count over LoRaWAN if the transmission conditions are met.


  • Het arrangement Quickstart with the IoT Cube (by Fabian Reifler) is gemaakt met Wikiwijs van Kennisnet. Wikiwijs is hét onderwijsplatform waar je leermiddelen zoekt, maakt en deelt.

    Auteur
    Vetskilling
    Laatst gewijzigd
    2024-10-29 17:47:55
    Licentie

    Dit lesmateriaal is gepubliceerd onder de Creative Commons Naamsvermelding 4.0 Internationale licentie. Dit houdt in dat je onder de voorwaarde van naamsvermelding vrij bent om:

    • het werk te delen - te kopiëren, te verspreiden en door te geven via elk medium of bestandsformaat
    • het werk te bewerken - te remixen, te veranderen en afgeleide werken te maken
    • voor alle doeleinden, inclusief commerciële doeleinden.

    Meer informatie over de CC Naamsvermelding 4.0 Internationale licentie.

    Aanvullende informatie over dit lesmateriaal

    Van dit lesmateriaal is de volgende aanvullende informatie beschikbaar:

    Toelichting
    In this teaching unit, learners programme their own IoT devices using a low-code environment.
    Eindgebruiker
    leerling/student
    Moeilijkheidsgraad
    gemiddeld
  • Downloaden

    Het volledige arrangement is in de onderstaande formaten te downloaden.

    Metadata

    LTI

    Leeromgevingen die gebruik maken van LTI kunnen Wikiwijs arrangementen en toetsen afspelen en resultaten terugkoppelen. Hiervoor moet de leeromgeving wel bij Wikiwijs aangemeld zijn. Wil je gebruik maken van de LTI koppeling? Meld je aan via info@wikiwijs.nl met het verzoek om een LTI koppeling aan te gaan.

    Maak je al gebruik van LTI? Gebruik dan de onderstaande Launch URL’s.

    Arrangement

    IMSCC package

    Wil je de Launch URL’s niet los kopiëren, maar in één keer downloaden? Download dan de IMSCC package.

    Meer informatie voor ontwikkelaars

    Wikiwijs lesmateriaal kan worden gebruikt in een externe leeromgeving. Er kunnen koppelingen worden gemaakt en het lesmateriaal kan op verschillende manieren worden geëxporteerd. Meer informatie hierover kun je vinden op onze Developers Wiki.