Chapter 4 Angles and symmetry

Chapter 4 Angles and symmetry

Homepage

Homepage:
On this site you can practice at your own pace and at your own level. But beware: this does require responsibility! Make sure you practice enough, that you are sure that you have mastered the material and above all that you notify your teacher when you run into something.

If you need help with the material or planning, go to your teacher. Remember to always ask questions!
And always read the theory in your textbook!

You can work through this site independently (or when your teacher tells you to). It is important that you watch the video’s, read the extra theory carefully and practice well. Make the exercises from your book! You can find out which exercises you can complete here. Mathematics is something that you learn through practice and repetition!

On the left you can see the sidebar. The items in the sidebar are:

  • The learning objectives: per paragraph are also described here. After working through a paragraph, check whether you meet these learning objectives.
  • Prior knowledge: Here you can review what you need to know before starting this chapter.
  • Paragraphs: these sections are divided into:
    • ​Written heory: here the theory is explained  in text and examples. Make sure you read this!
    • Theory in video's: often contains video's
    • Exercises: you can do these after going through the theory to check whether you have mastered the basics. IMPORTANT!: these do not replace the exercises in your book!


Make sure you work through all the paragraphs and get enough practice!

Learning objectives

Prior Knowlegde

Previously we talked about lines. Lines in math are always straight.

When you draw a line, it has no end points.
When you draw a line segment it has 2 end points, which are labeled with capital letters (e.g. AB).
When we draw a ray we draw a line with one end point.
Look at the picture on the right for the examples.

Remember we always label points with capital letters and lines with lowercase letters.

We also talked about perpendicular and parallel lines. Remember the song?:


And don't forget to always draw with a pencil and your protractor triangle!

4.1 Angles and Degrees

Written theory

An angle is formed from two straight lines, called rays. 
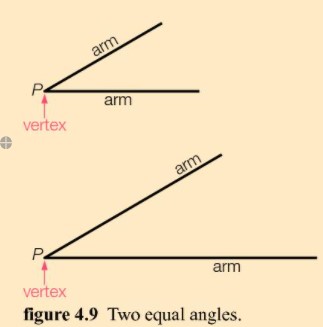
The two rays that make an angle are called arms. And they share the same endpoint. This endpoint is called the vertex of the angle. The angle is labelled with a capital letter.

Now we have already seen the most important angle in math. The right angle. This angle is made when two arms are perpendicular. And the angle they make is 90 degrees.
In the picture below you can see the 5 types of lines you’ll need to know.
It is important to know that:

  • the acute angle is an angle which is smaller than 90 degrees.
  • the abtuse angle is an angle which is bigger than 90 degrees.
  • the straight angle is exactly 180 degrees and makes a straight line.
  • the full angle is 0 degrees.

Theory in video's


You will learn something about reflex angles, remember that we mostly use the smallest angle unless said otherwise!

Exercises

4.2 Measuring and Drawing Angles

Written theory

How to measure angles with a protractor triangle:

How to draw angles using a protractor triangle:

Theory in video's

He will show you how to measure an angle with a protractor. But we use a protractor triangle. Which actually has a protractor on it. To learn this check out this video

Exercises

Try drawing the following angles:

  • 25 degree angle
  • 180 degree angle
  • 74 degree angle
  • 162 degree angle

Make sure you measure them again after you've drawn them. You can send them to your teacher if you want to check if they are correct. You can also ask you teacher for more practice material if the exercises in your book aren't enough.

4.3 Calculating Angles

Written theory

We have learn so far that a right angle is 90 degrees and straight line, or a straight angle is 180 degrees. We are going to use this last property to help us calculate unknown angles.
Look at this picture:


Here you see that 2 straight lines intersect and form a cross. We see that S1 is 50 degrees. We also see that S1 and S2 make a straight line.

So this means that S1 + S2 = 180. Now we know how many degrees S1 is. So we can also figure out how big S2 is. Because S2 = 180 – 50, So S2 = 130 degrees (because S1 and S2 are a straight line).

Now if I look at S1 and S4 they also make a straight line. So I can also calculate how big S4 is.
Because S1 + S4 = 180. We still know S1 is 50 degrees.

So S4 = 180 – 50 and that means S4 = 130 degrees (because S1 and S4 are a straight line).

As you can see S4 and S2 are the same. Now if we also calculate S3 with what we know we come to the conclusion that S3 = 180 – 130 = 50 degrees.

So we know that S3 and S1 are the same size as well.
This is true for all cases were 2 lines intersect. Opposite angles are the same size.

Here is some prove you can also find in your book:


Now there are to very important things you need to remember.

  1. This only works if the lines intersecting are straight. If a line bends at the intersecting point the opposite angles are no longer the same size. 
  2. You always have to write down in brackets why you say the angle is a certain size. E.g. angle S3 is 50 degrees (opposite angles). Or angle S2 = 180 – 50 = 130 degrees (straight angle)

You are now going to try and calculate angles. Make sure to use there rules:

  • A right angle is 90 degrees
  • A straight angle is 180 degrees
  • Opposite angles are the same

Theory in video's


Exercises

4.4 Line Symmetry

Written theory

In the videos you can see what line symmetry is. Here I am going to show you how to draw a mirror 
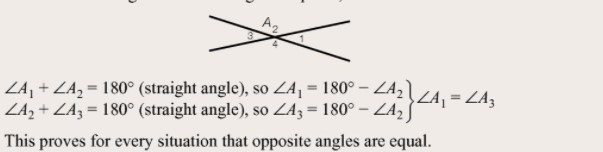
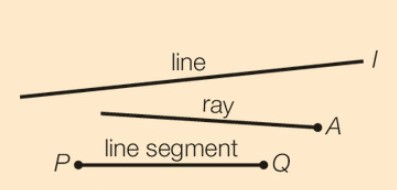
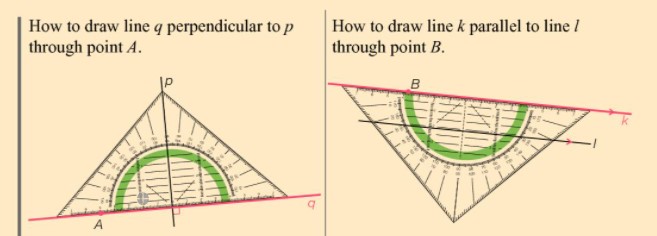
image. On page 159 on your text book you can find this picture. These are the same steps I am going to go through.

Theory in video's

Now this video talks about vertical and horizontal line symmetry, but no matter which direction a shape is line symmetrical if a line can be drawn and the image can be mirrored and look exactly the same.

More about line symmetry

Smart trick to bisect an angle:

Exercises

If you need extra pratice try to make more exercises from this paragraf from your textbook.

4.5 Rotational Symmetry

Written theory

In the videos it was explained what rotational and point symmetry was, what the difference between, line, point and rotational symmetry is and even the order of rotational symmetry. Which is basically: how many times can I rotate the figure or image to look the same.
Now let’s look at the image below.

Here we see 3 figures. And all three have rotational symmetry.
Now the first one has an order of 2, the second one an order of 3 and the third one an order of 5.
In math we not only want to know the order of rotational symmetry but also the smallest possible angle of rotation a figure has.

For this we use the order of rotation and the fact that a figure rotates 360 degrees to come full circle (become itself again).
The way we calculate the smallest angle of rotation is we divide 360 by the order of rotation.  

Now let’s calculate the smallest angle of rotation for the three figures:

  1. 360 : 2 =180 degrees. Oh, but wait if a figure’s smallest angle of rotation is 180 then it was also point symmetrical. So, this one has both point and rotational symmetry.
  2. 360 : 3 = 120 degrees.
  3. 360 : 5 = 72 degrees.


Now remember if a figure has 360 degrees as the smallest angle of rotation the figure does not have rotational symmetry!

Theory in video's


Explained through text and pictures:


Extra explination:

Exercises

  • Het arrangement Chapter 4 Angles and symmetry is gemaakt met Wikiwijs van Kennisnet. Wikiwijs is hét onderwijsplatform waar je leermiddelen zoekt, maakt en deelt.

    Auteur
    Denise Norton Je moet eerst inloggen om feedback aan de auteur te kunnen geven.
    Laatst gewijzigd
    2024-01-08 08:46:14
    Licentie

    Dit lesmateriaal is gepubliceerd onder de Creative Commons Naamsvermelding 4.0 Internationale licentie. Dit houdt in dat je onder de voorwaarde van naamsvermelding vrij bent om:

    • het werk te delen - te kopiëren, te verspreiden en door te geven via elk medium of bestandsformaat
    • het werk te bewerken - te remixen, te veranderen en afgeleide werken te maken
    • voor alle doeleinden, inclusief commerciële doeleinden.

    Meer informatie over de CC Naamsvermelding 4.0 Internationale licentie.

    Aanvullende informatie over dit lesmateriaal

    Van dit lesmateriaal is de volgende aanvullende informatie beschikbaar:

    Eindgebruiker
    leerling/student
    Moeilijkheidsgraad
    gemiddeld
    Studiebelasting
    4 uur en 0 minuten
  • Downloaden

    Het volledige arrangement is in de onderstaande formaten te downloaden.

    Metadata

    LTI

    Leeromgevingen die gebruik maken van LTI kunnen Wikiwijs arrangementen en toetsen afspelen en resultaten terugkoppelen. Hiervoor moet de leeromgeving wel bij Wikiwijs aangemeld zijn. Wil je gebruik maken van de LTI koppeling? Meld je aan via info@wikiwijs.nl met het verzoek om een LTI koppeling aan te gaan.

    Maak je al gebruik van LTI? Gebruik dan de onderstaande Launch URL’s.

    Arrangement

    IMSCC package

    Wil je de Launch URL’s niet los kopiëren, maar in één keer downloaden? Download dan de IMSCC package.

    Meer informatie voor ontwikkelaars

    Wikiwijs lesmateriaal kan worden gebruikt in een externe leeromgeving. Er kunnen koppelingen worden gemaakt en het lesmateriaal kan op verschillende manieren worden geëxporteerd. Meer informatie hierover kun je vinden op onze Developers Wiki.